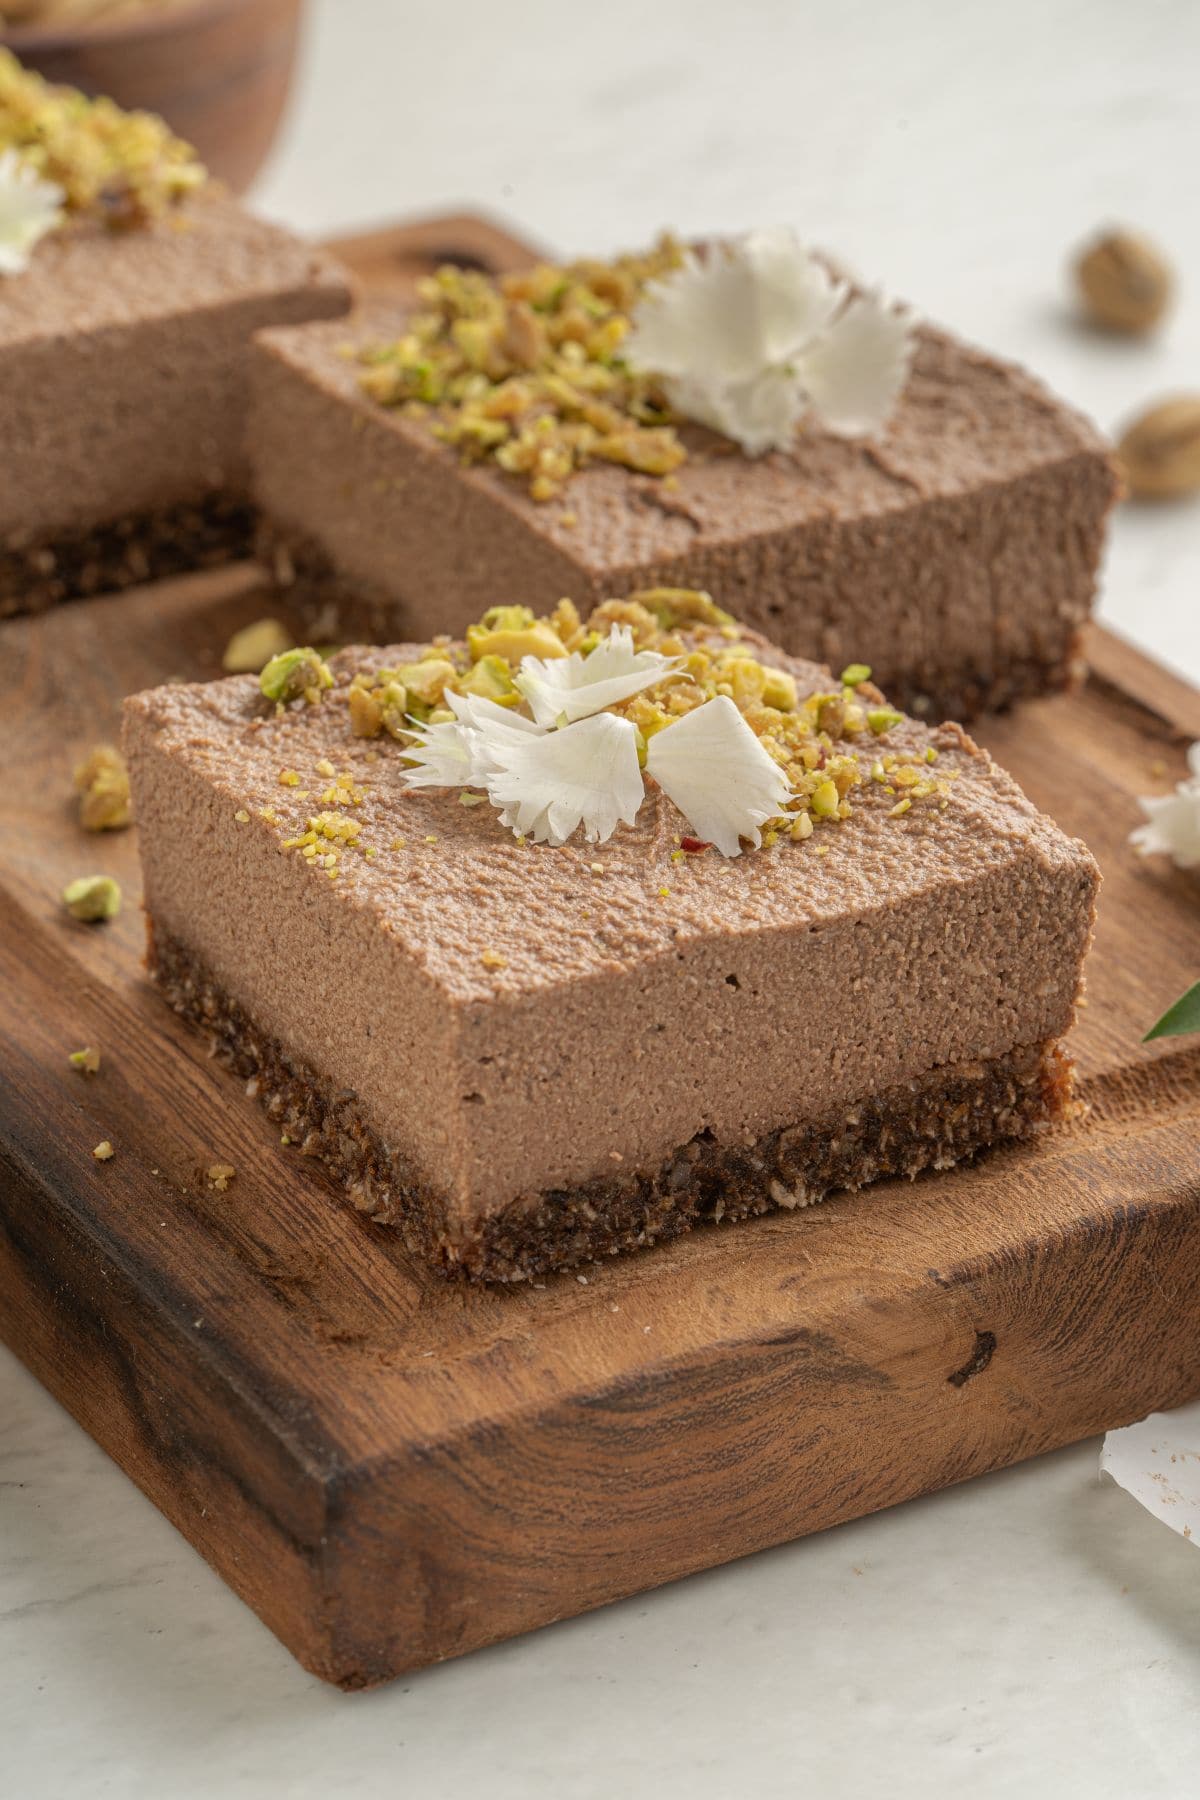
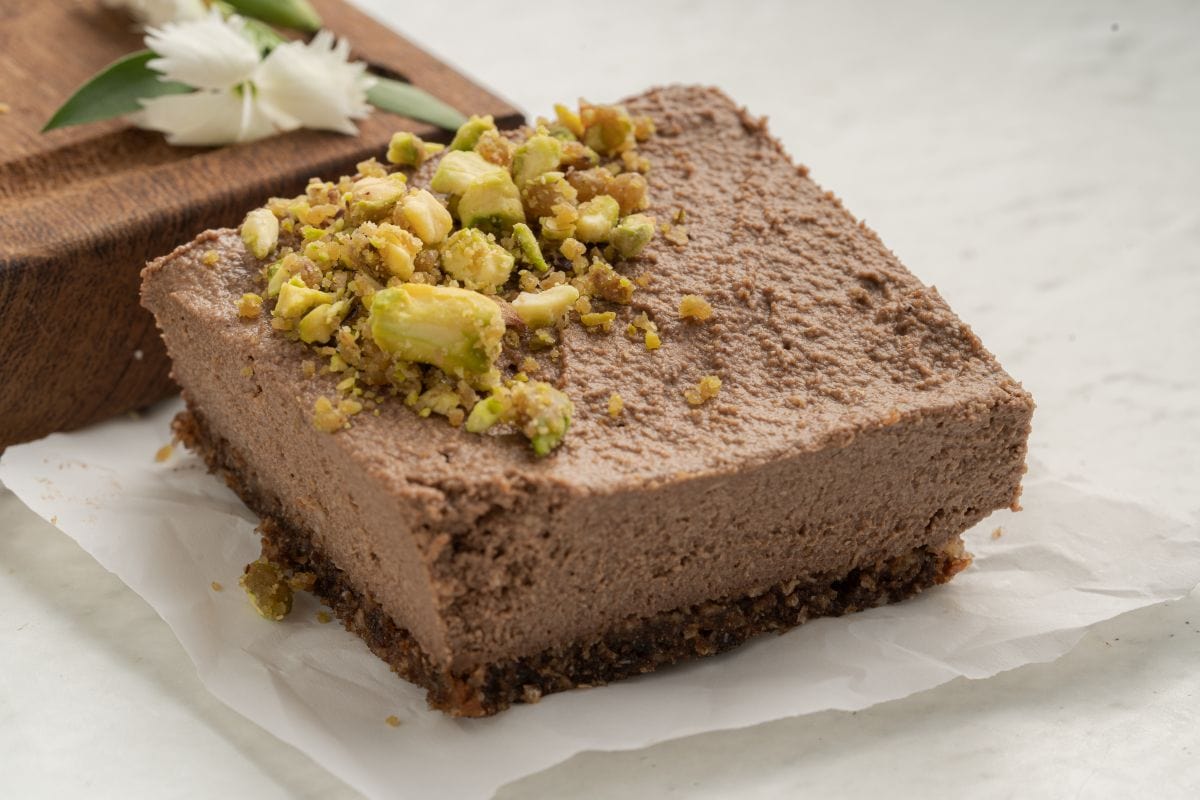
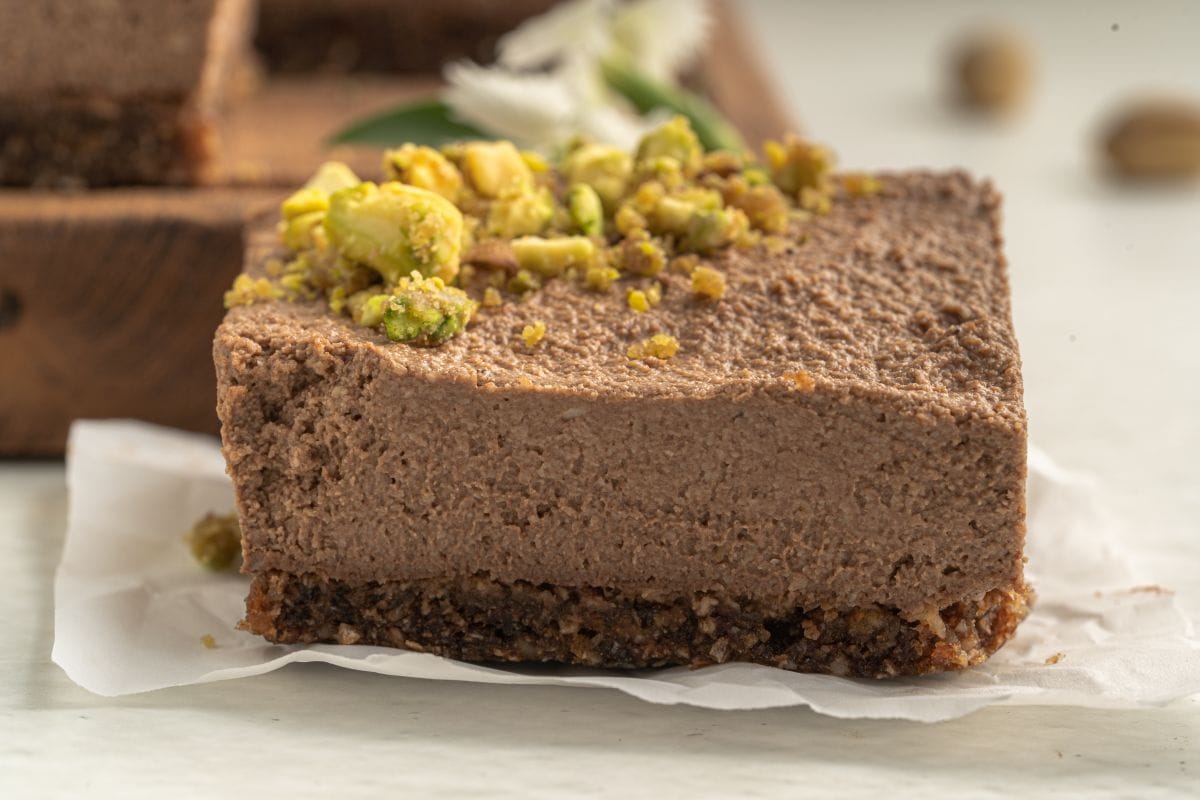
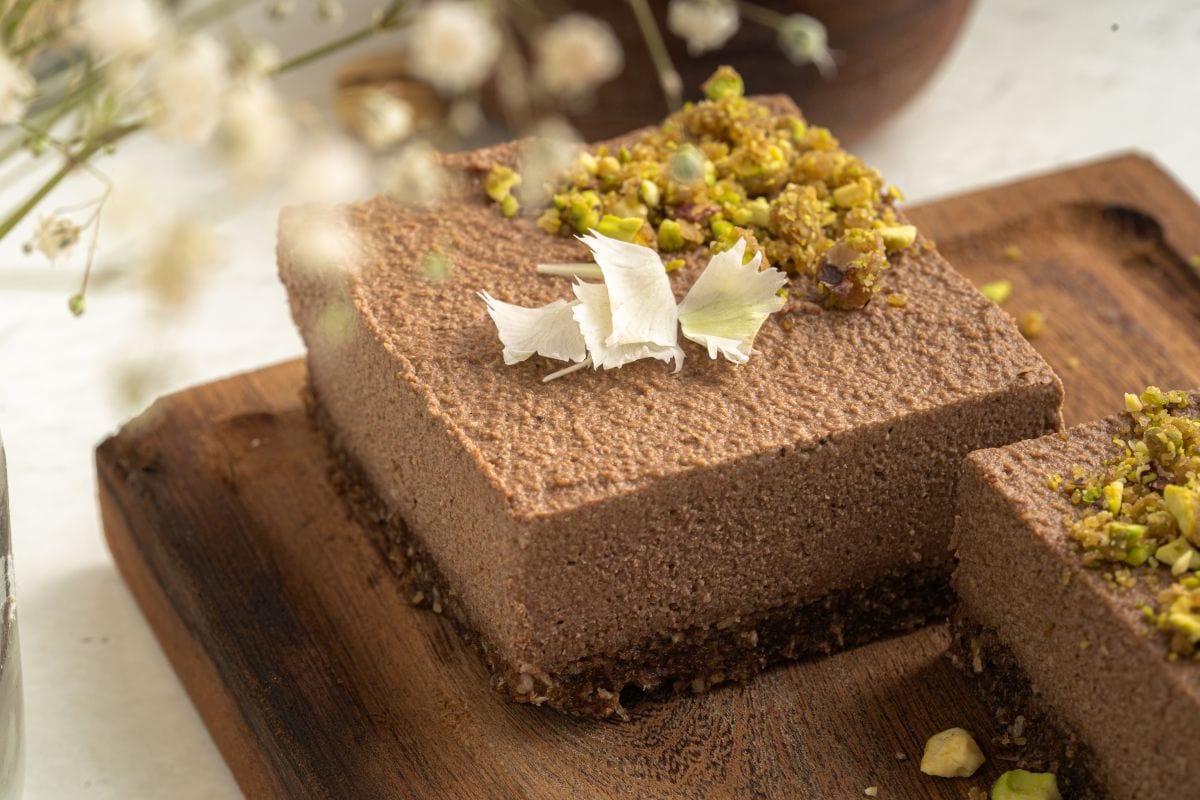
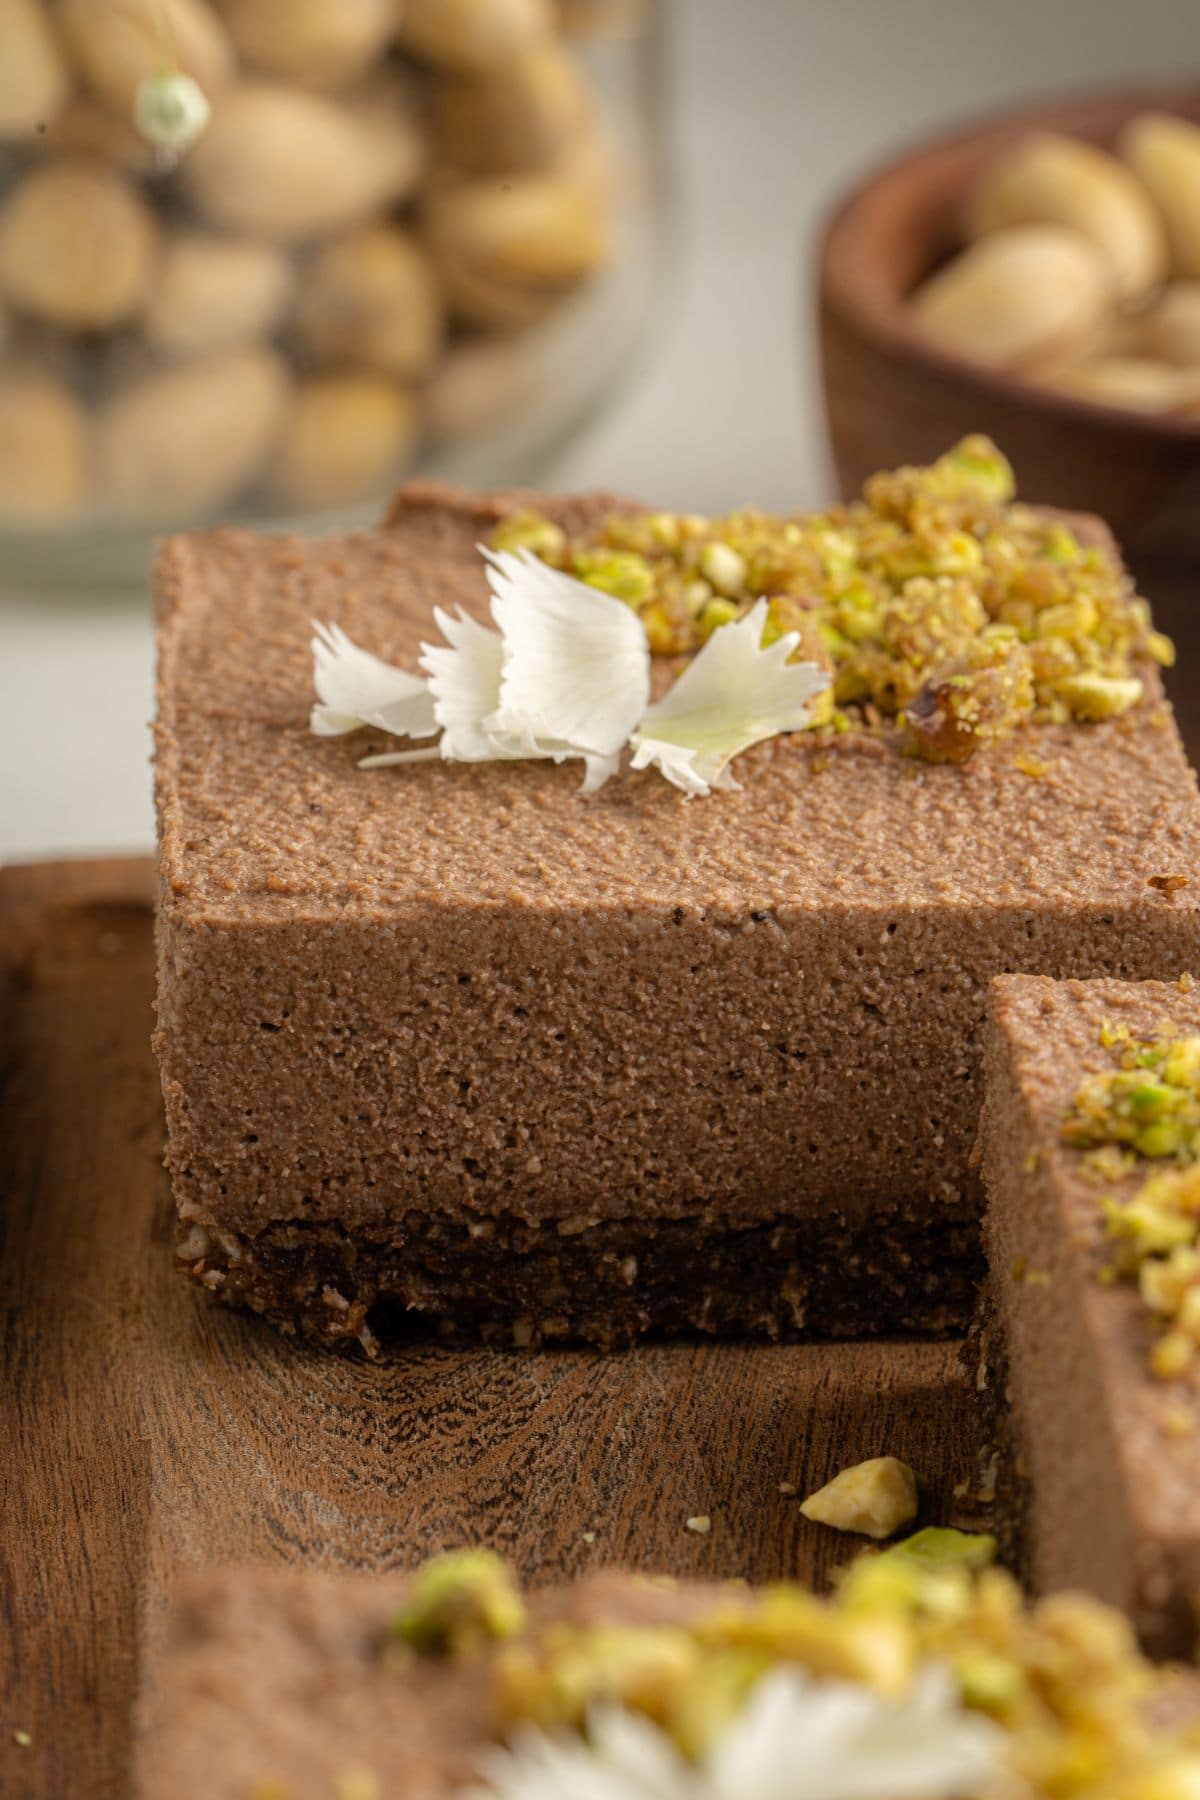
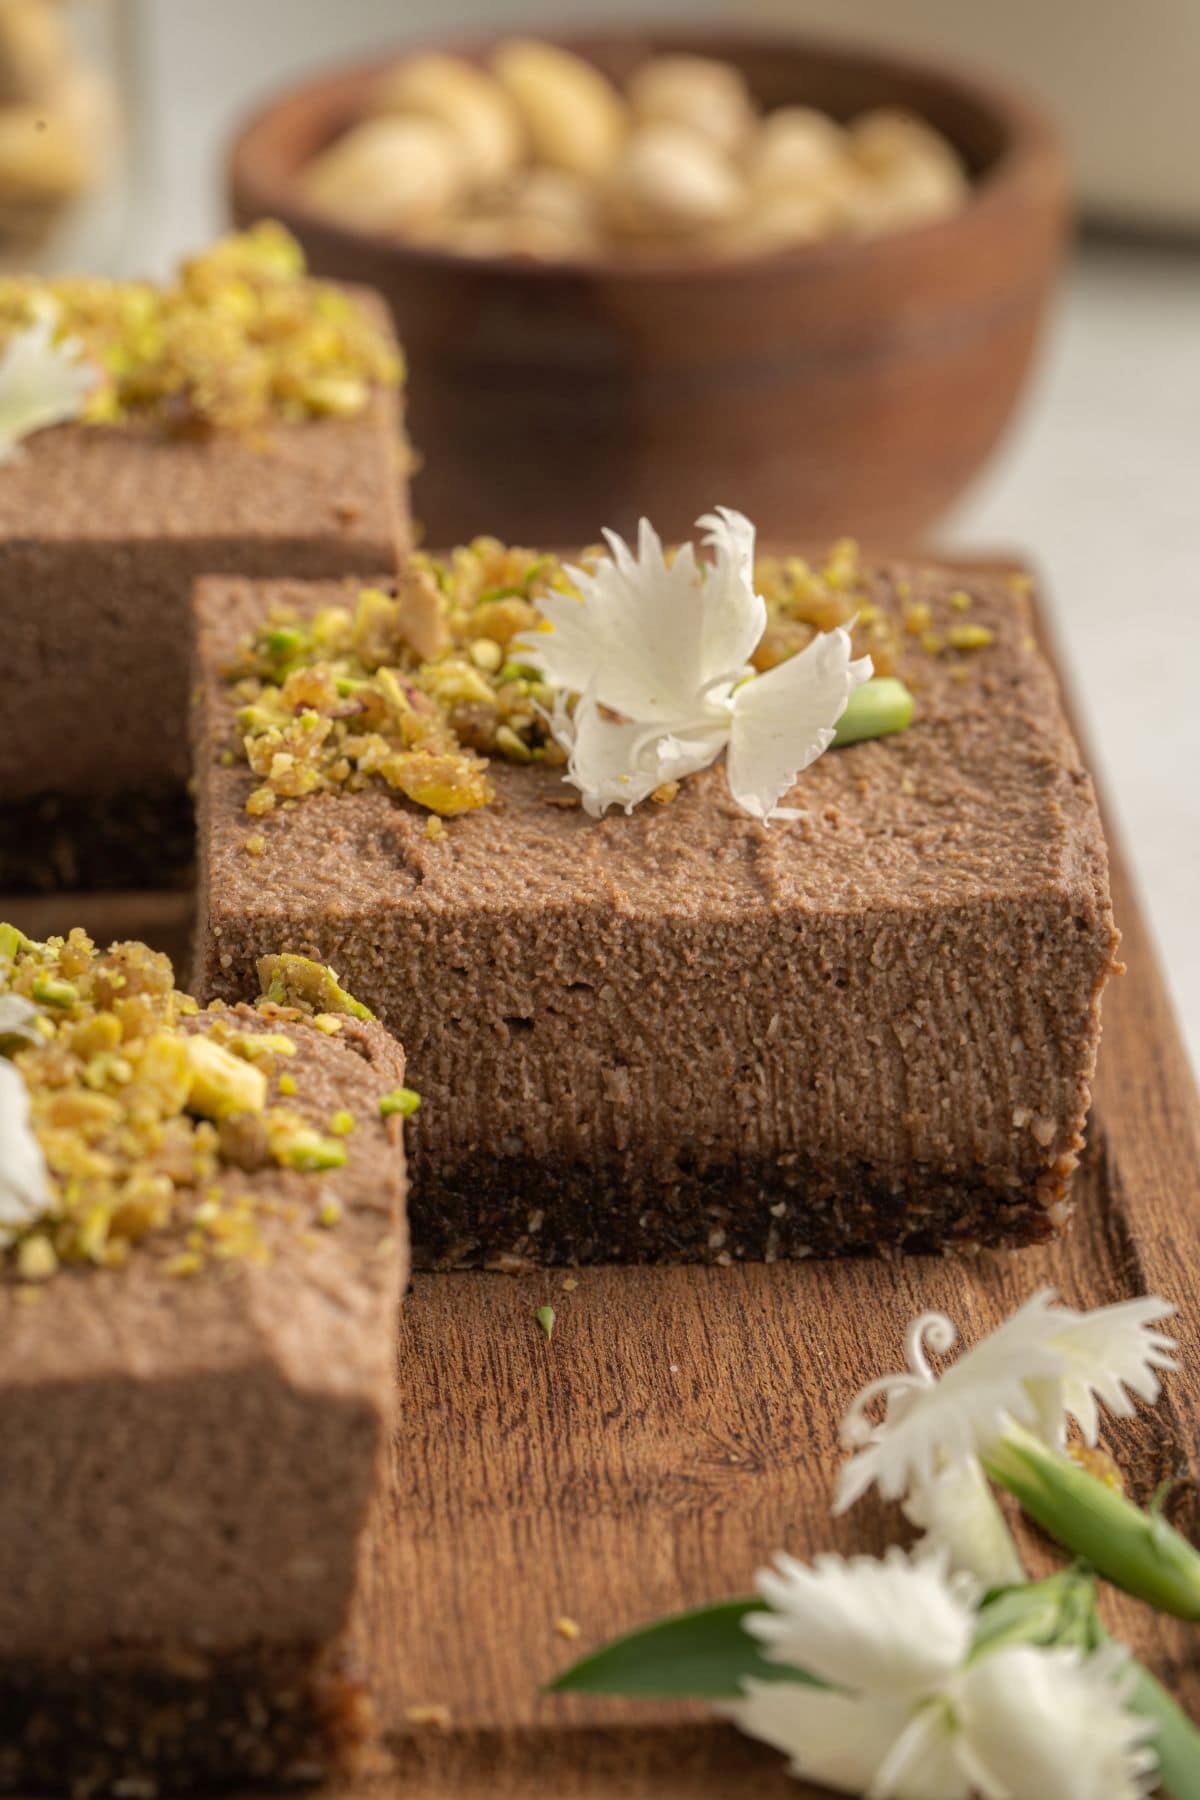
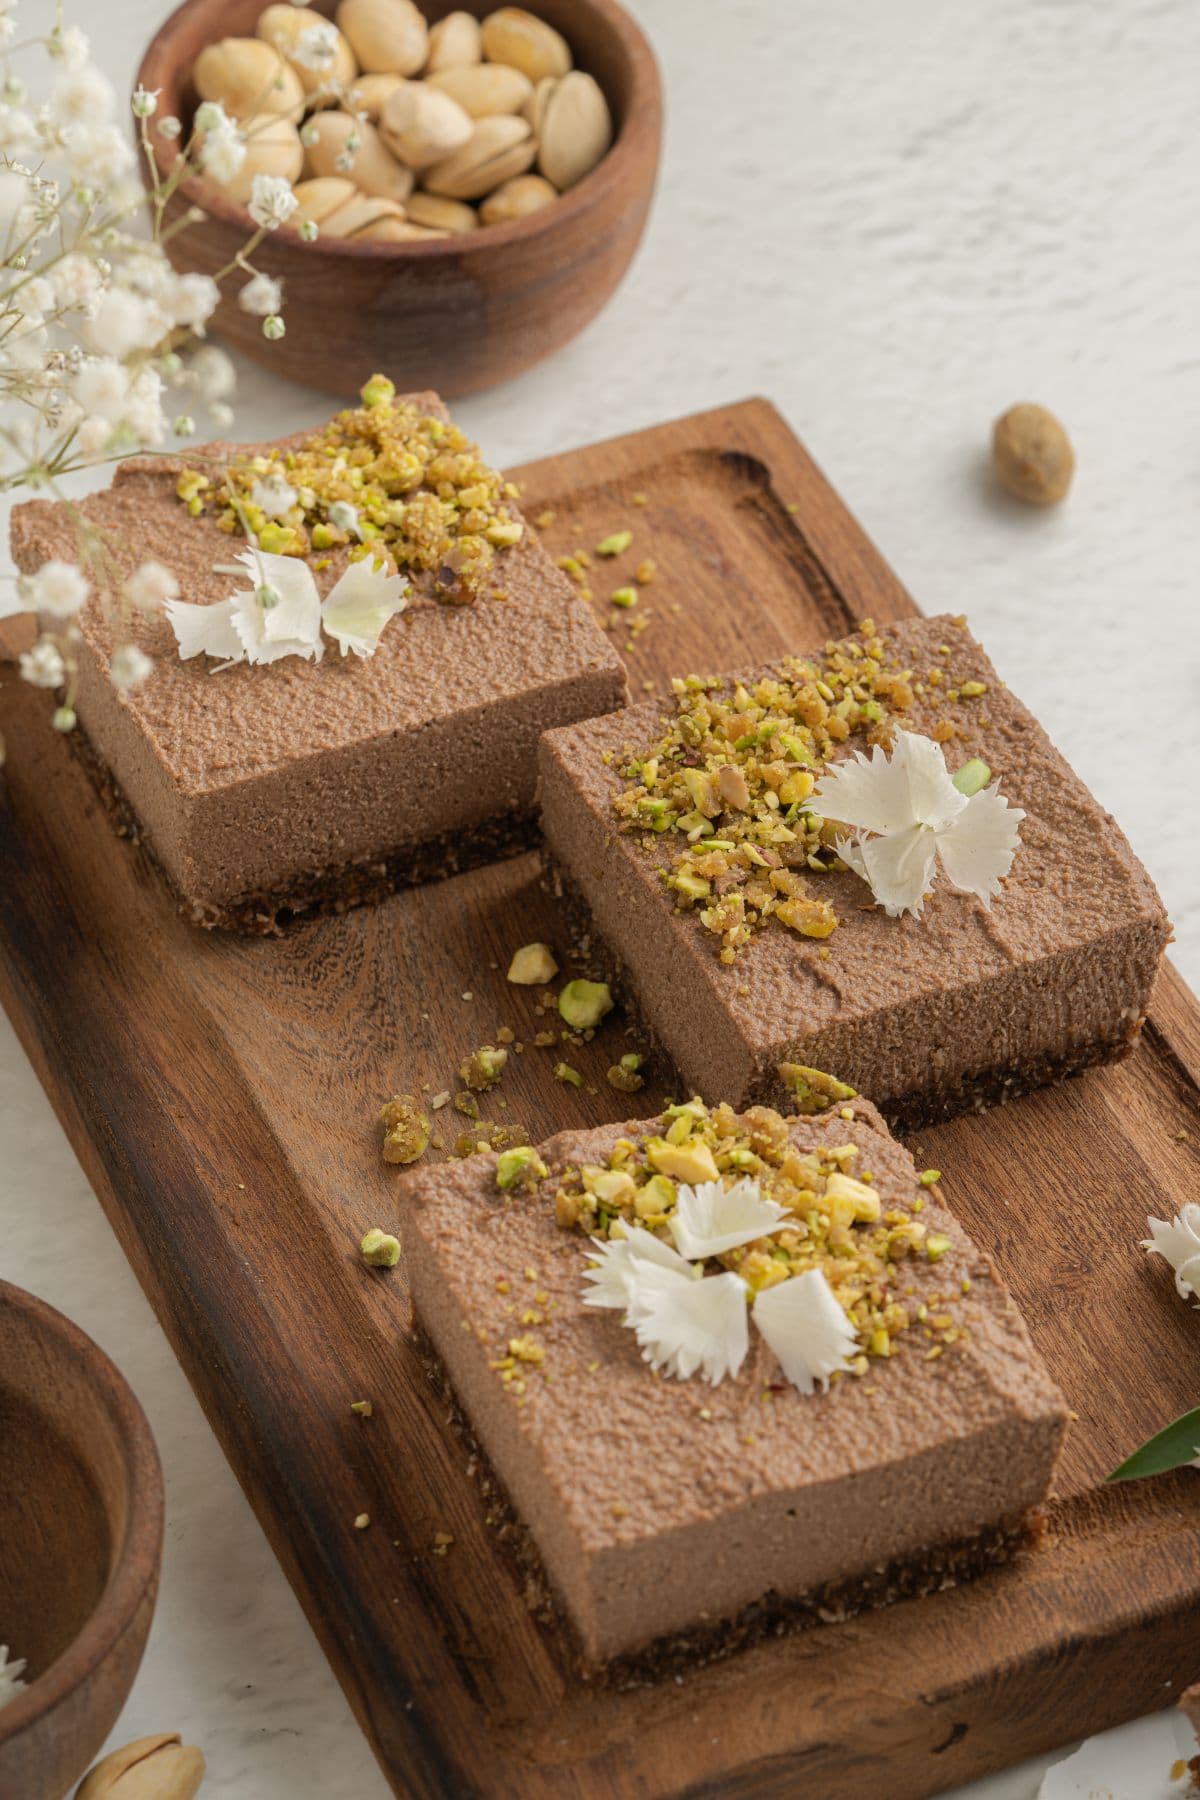
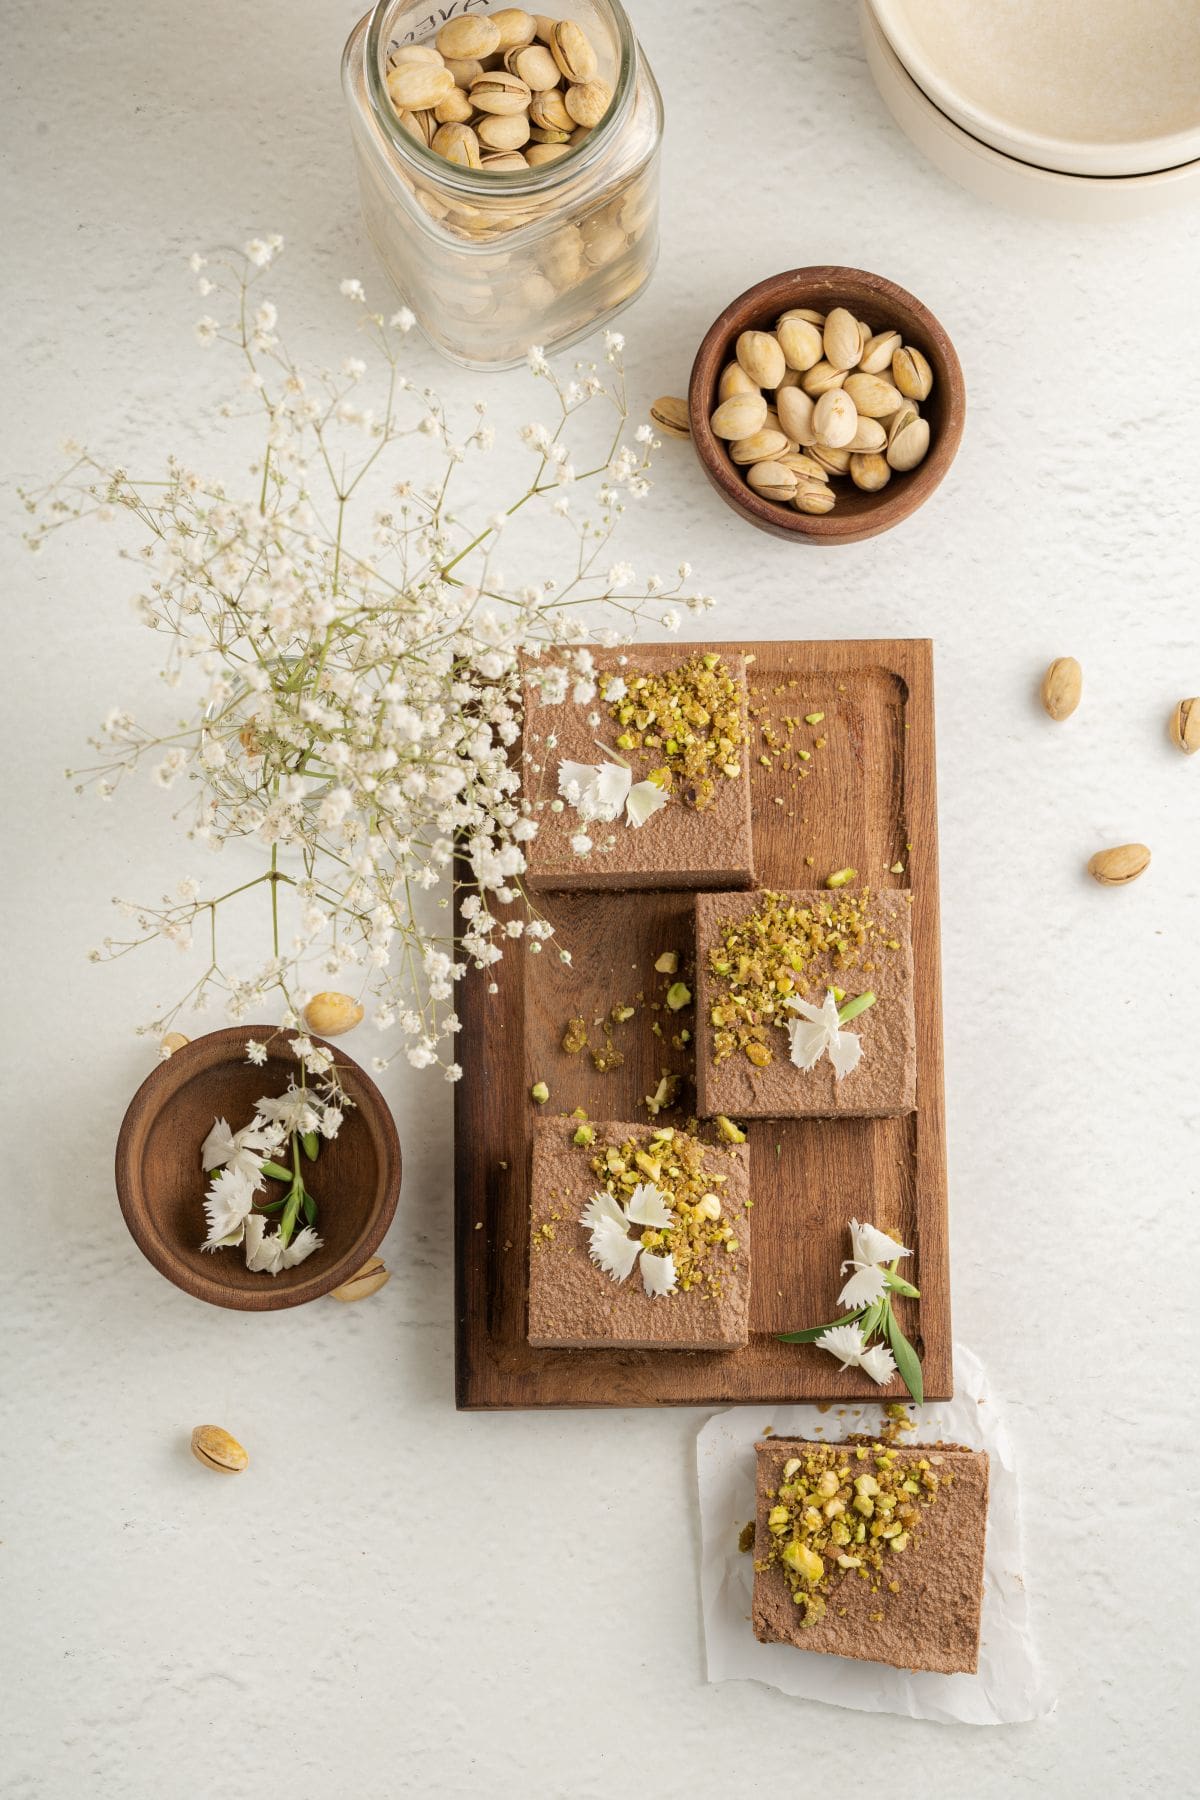
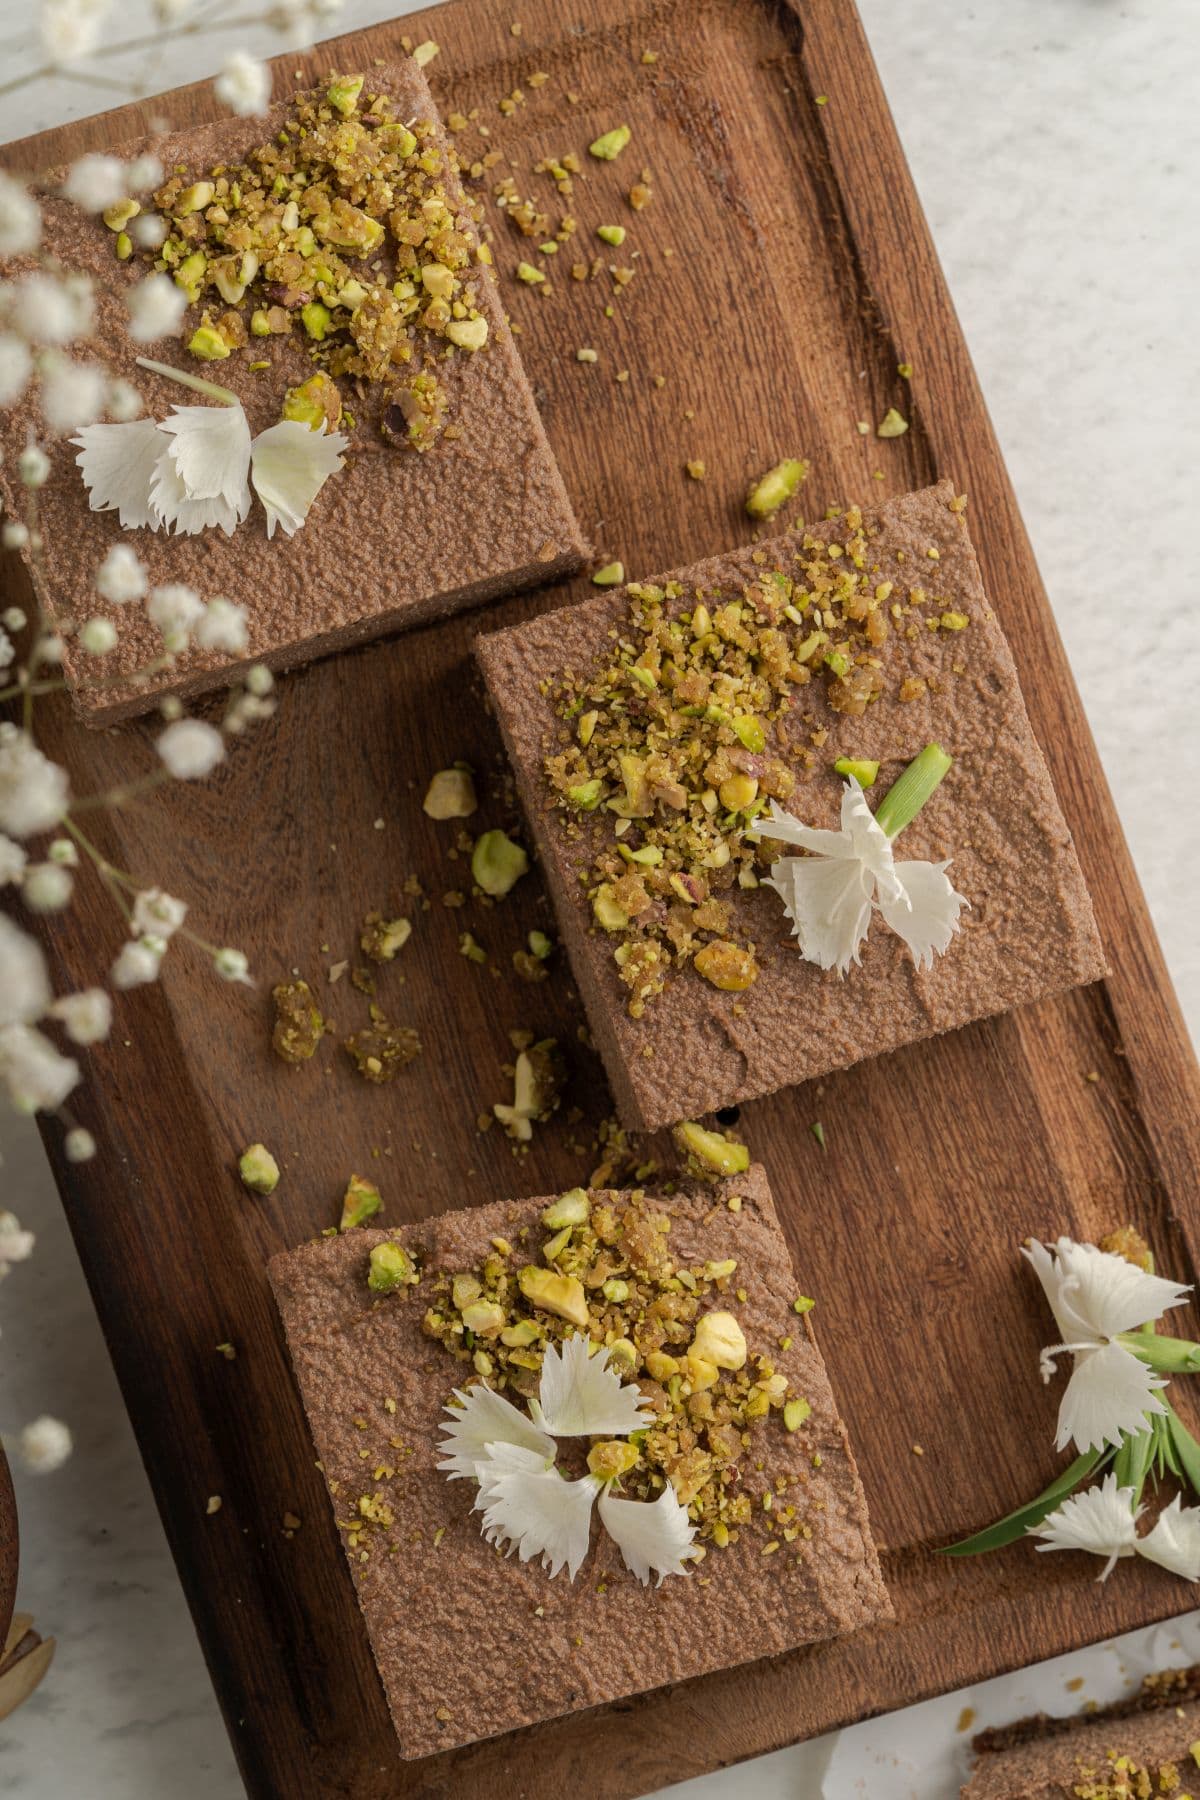
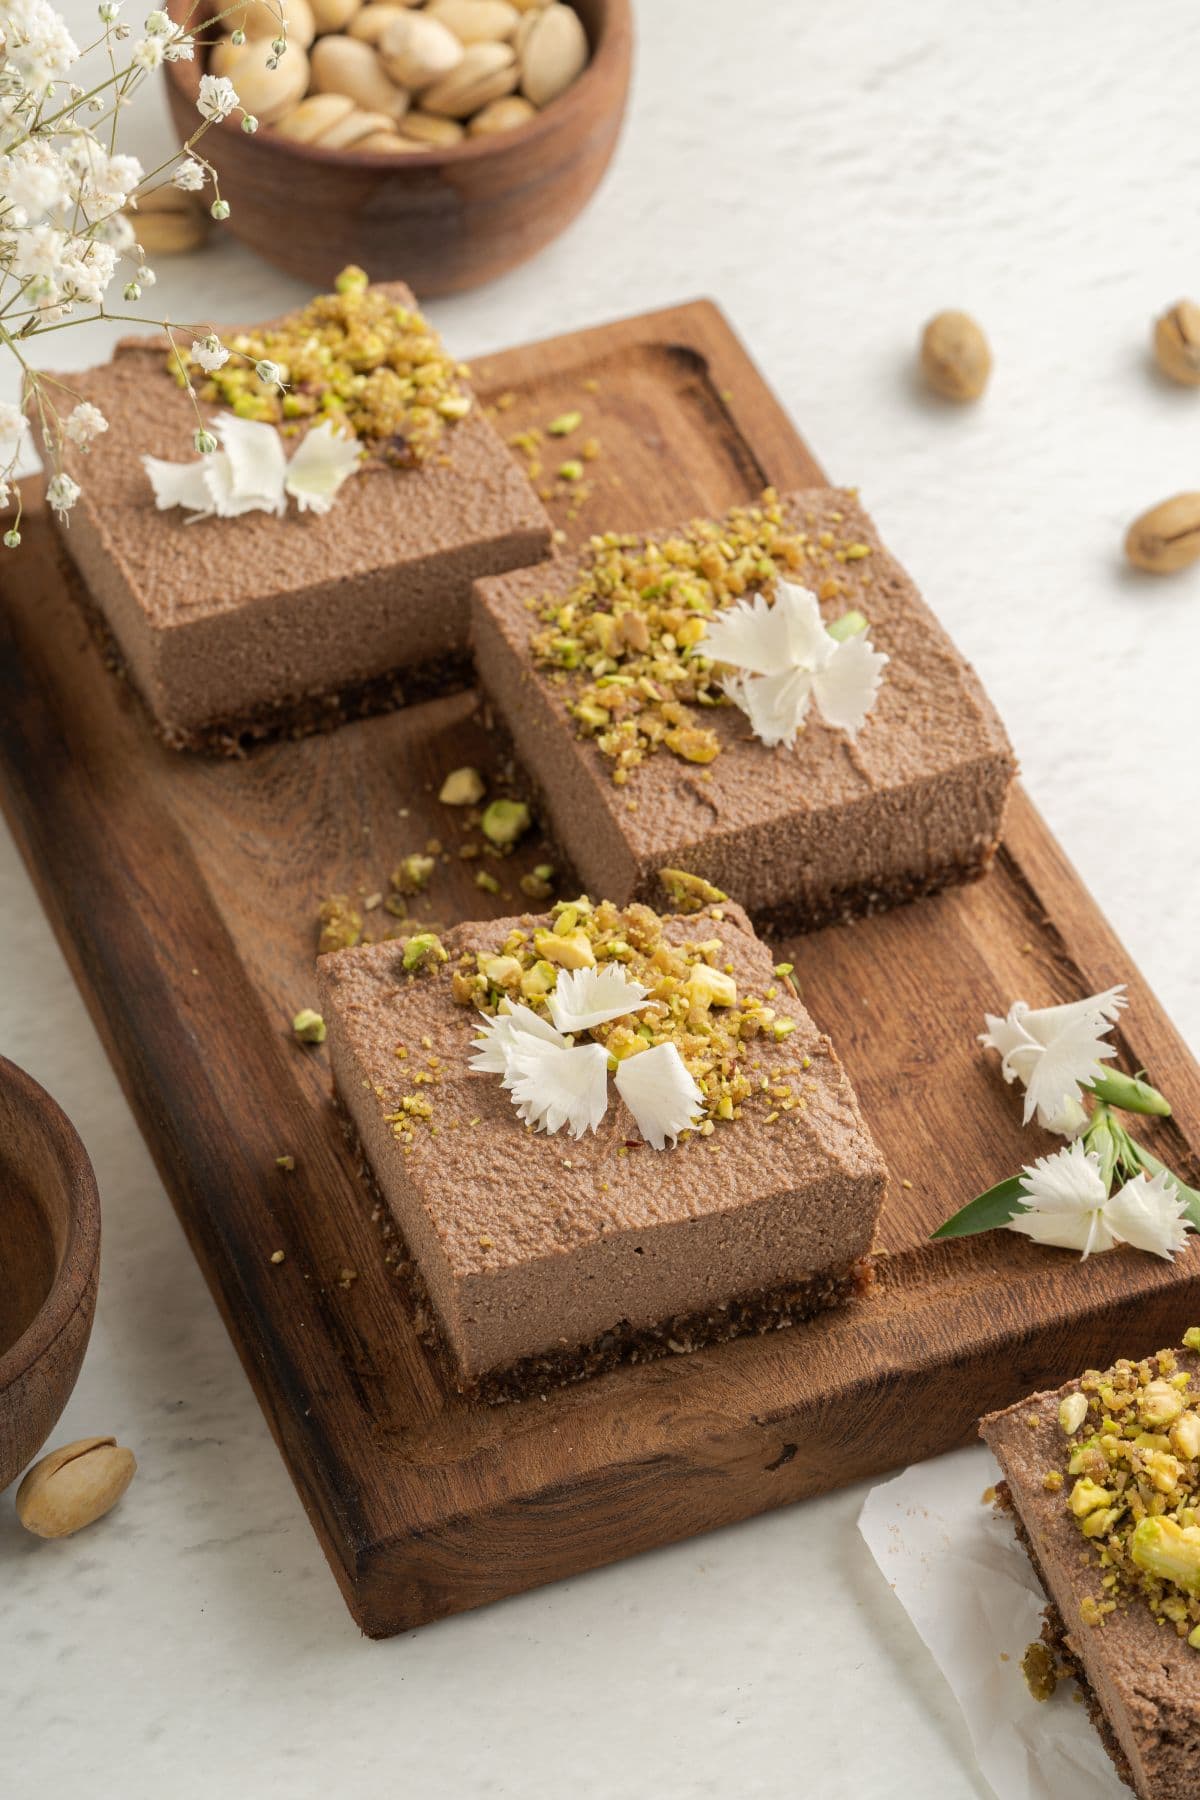
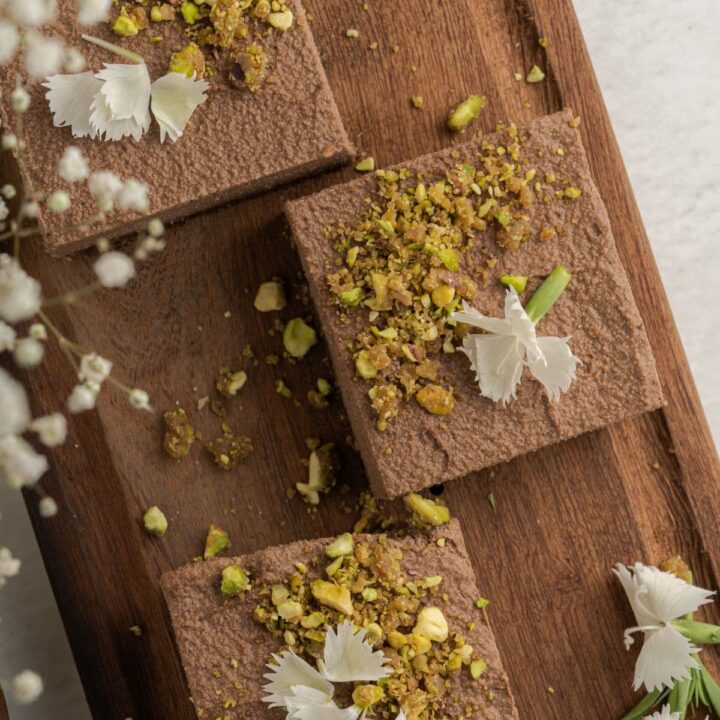
These no-bake chocolate and pistachio slices combine a moist and sweet crust with a smooth chocolate filling. They are topped off with a pistachio praline that provides crunchiness and sweetness.
All about No-Bake Chocolate and Pistachio Slices
This recipe for no-bake chocolate and pistachio slices will satisfy your sweet tooth in a healthy way. The crust is made of dates, walnuts, shredded coconut, and cacao powder. The filling is made with soaked and softened cashews, coconut milk and oil, liquid stevia, vanilla extract, and cacao powder. This combination creates a smooth and creamy texture. In contrast to the creamy filling, the crunchy pistachio praline finishes off the dessert.
Ingredients You’ll Need for this Recipe
For the base:
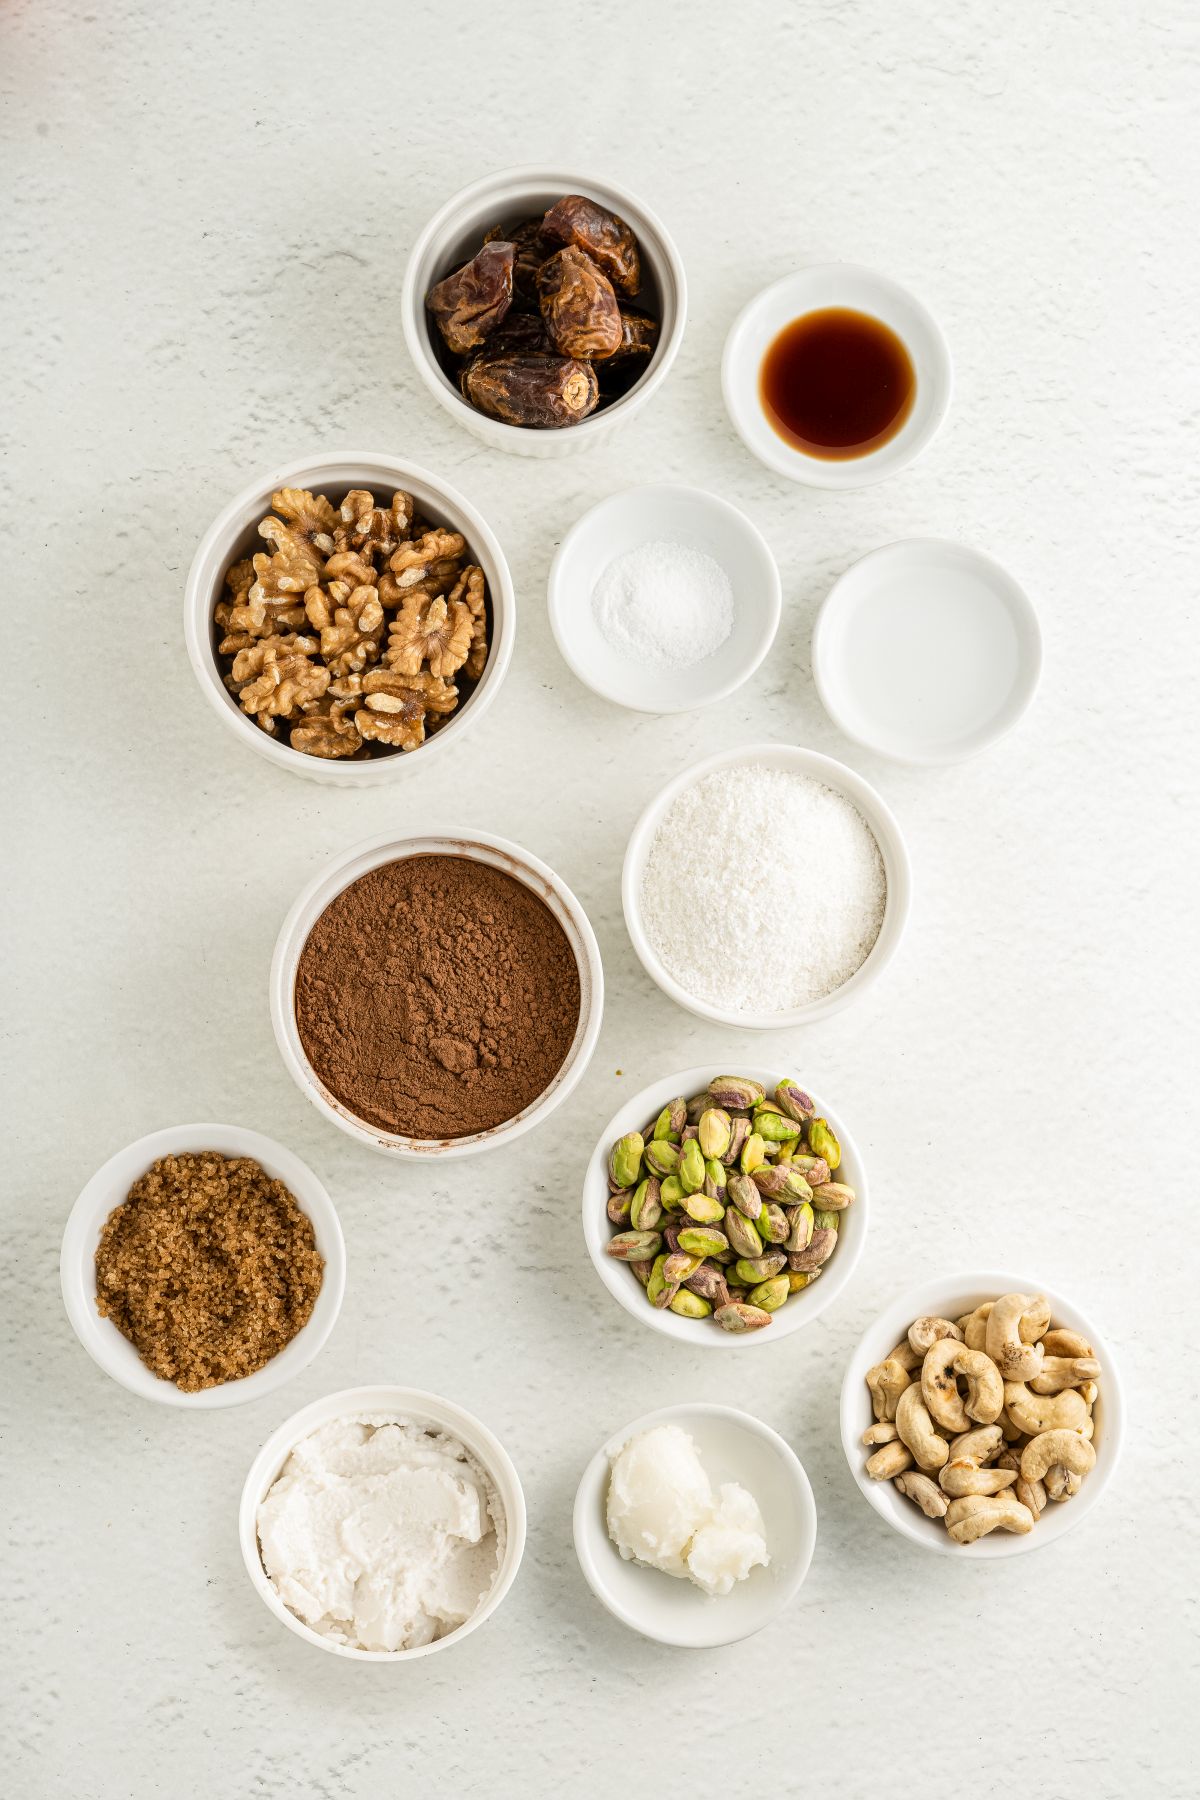
- Packed pitted dates
- Walnuts
- Shredded coconut
- Cacao powder
For the filling:
- Raw cashews, soaked
- Canned coconut milk
- Liquid stevia
- Vanilla extract
- Cacao powder
- Salt
- Melted coconut oil
For the topping:
- Peeled pistachios
- Brown sugar (any kind of sugar will work)
- Water

How to Make No-Bake Chocolate and Pistachio Slices
Make the base:
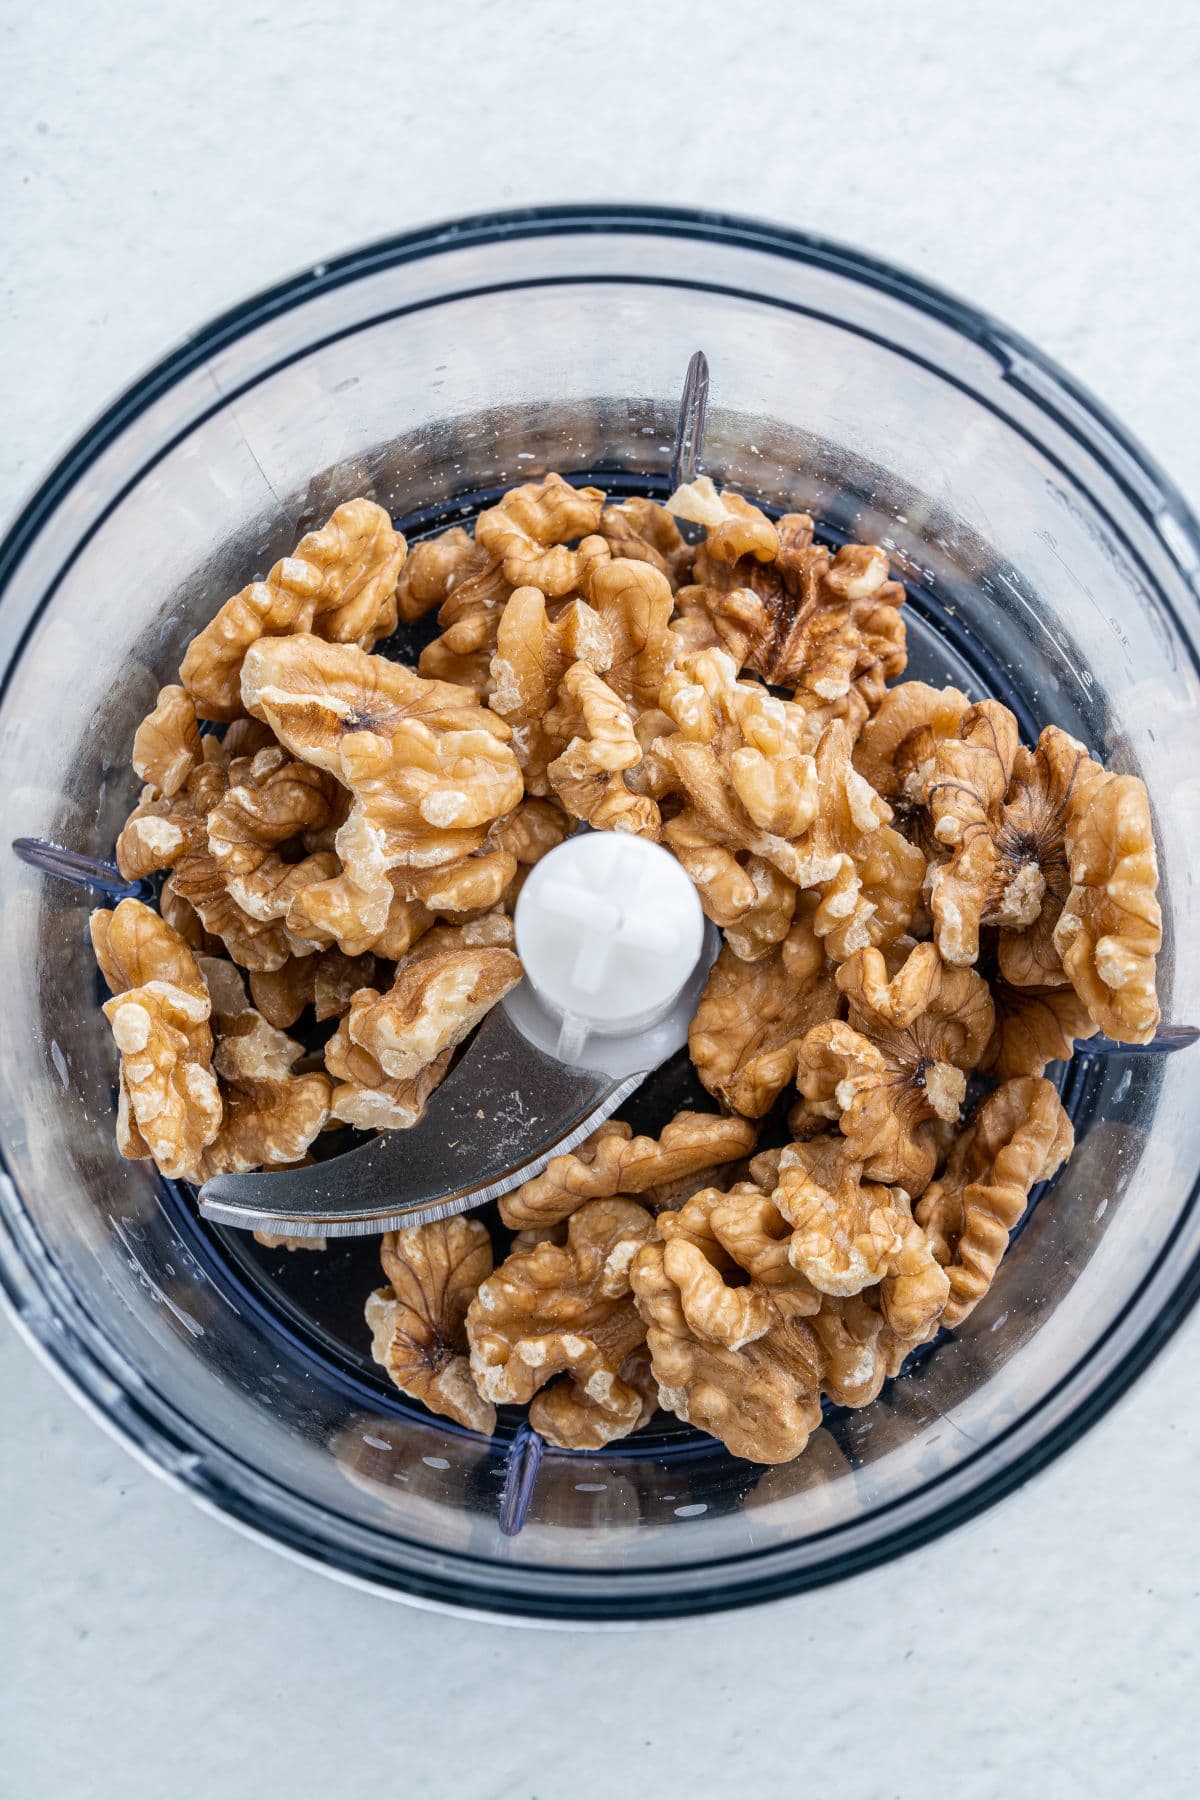
- Place the walnuts in a blender or food processor. Pulse until it reaches a ground consistency.
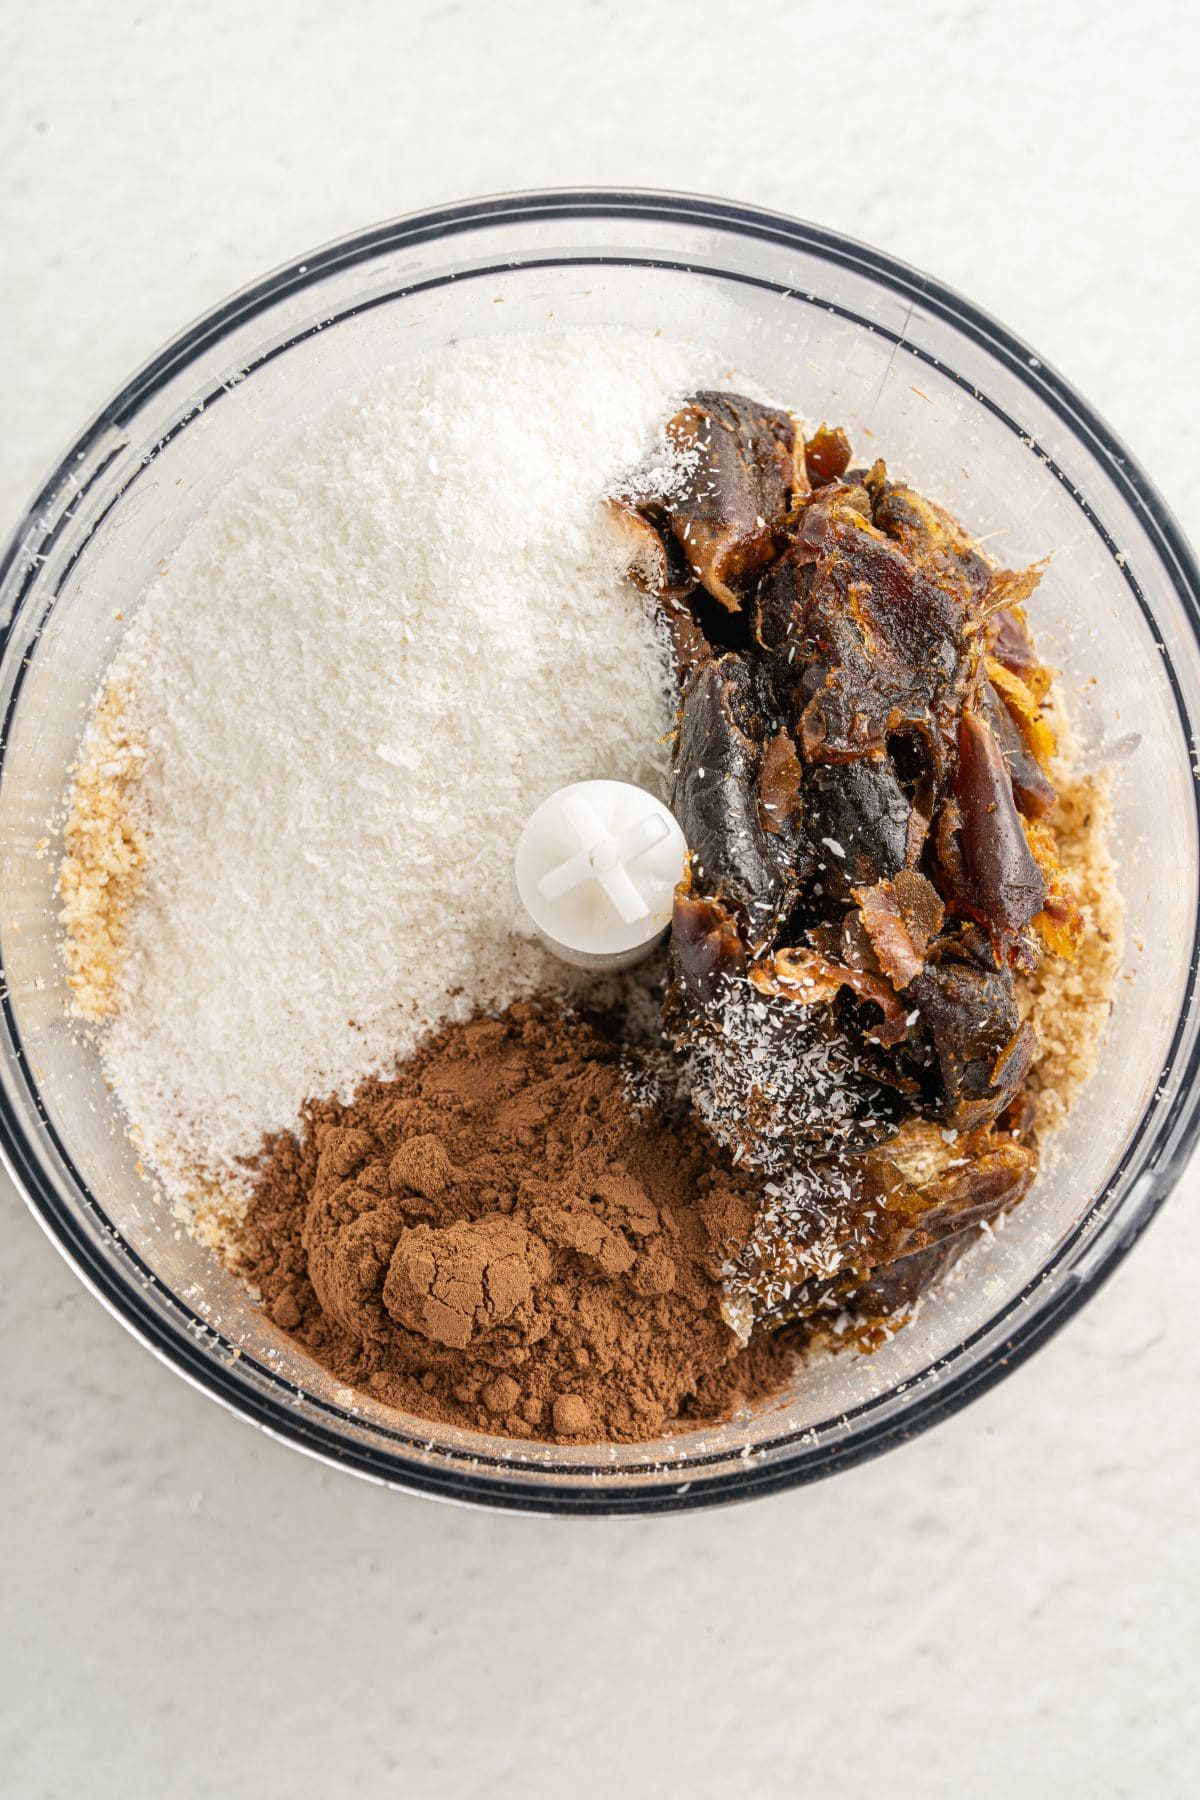
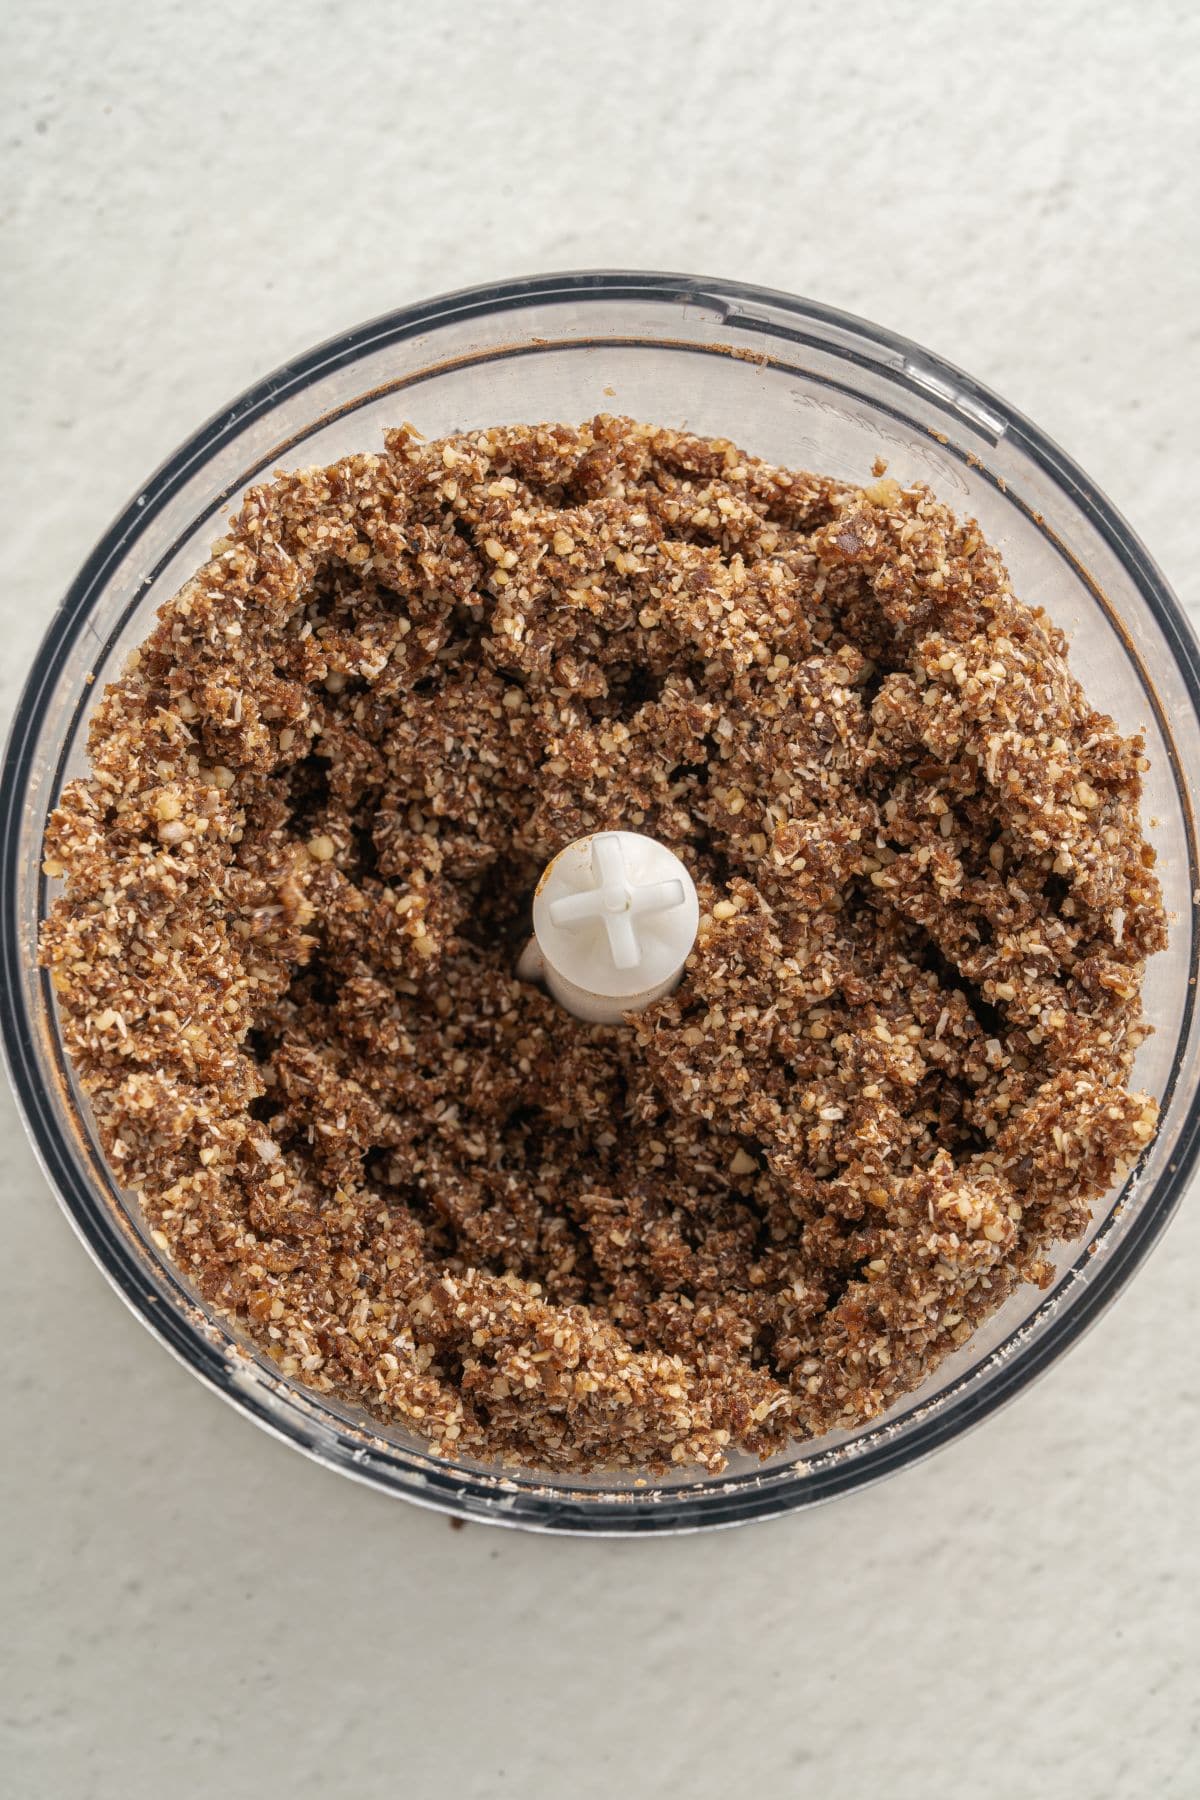
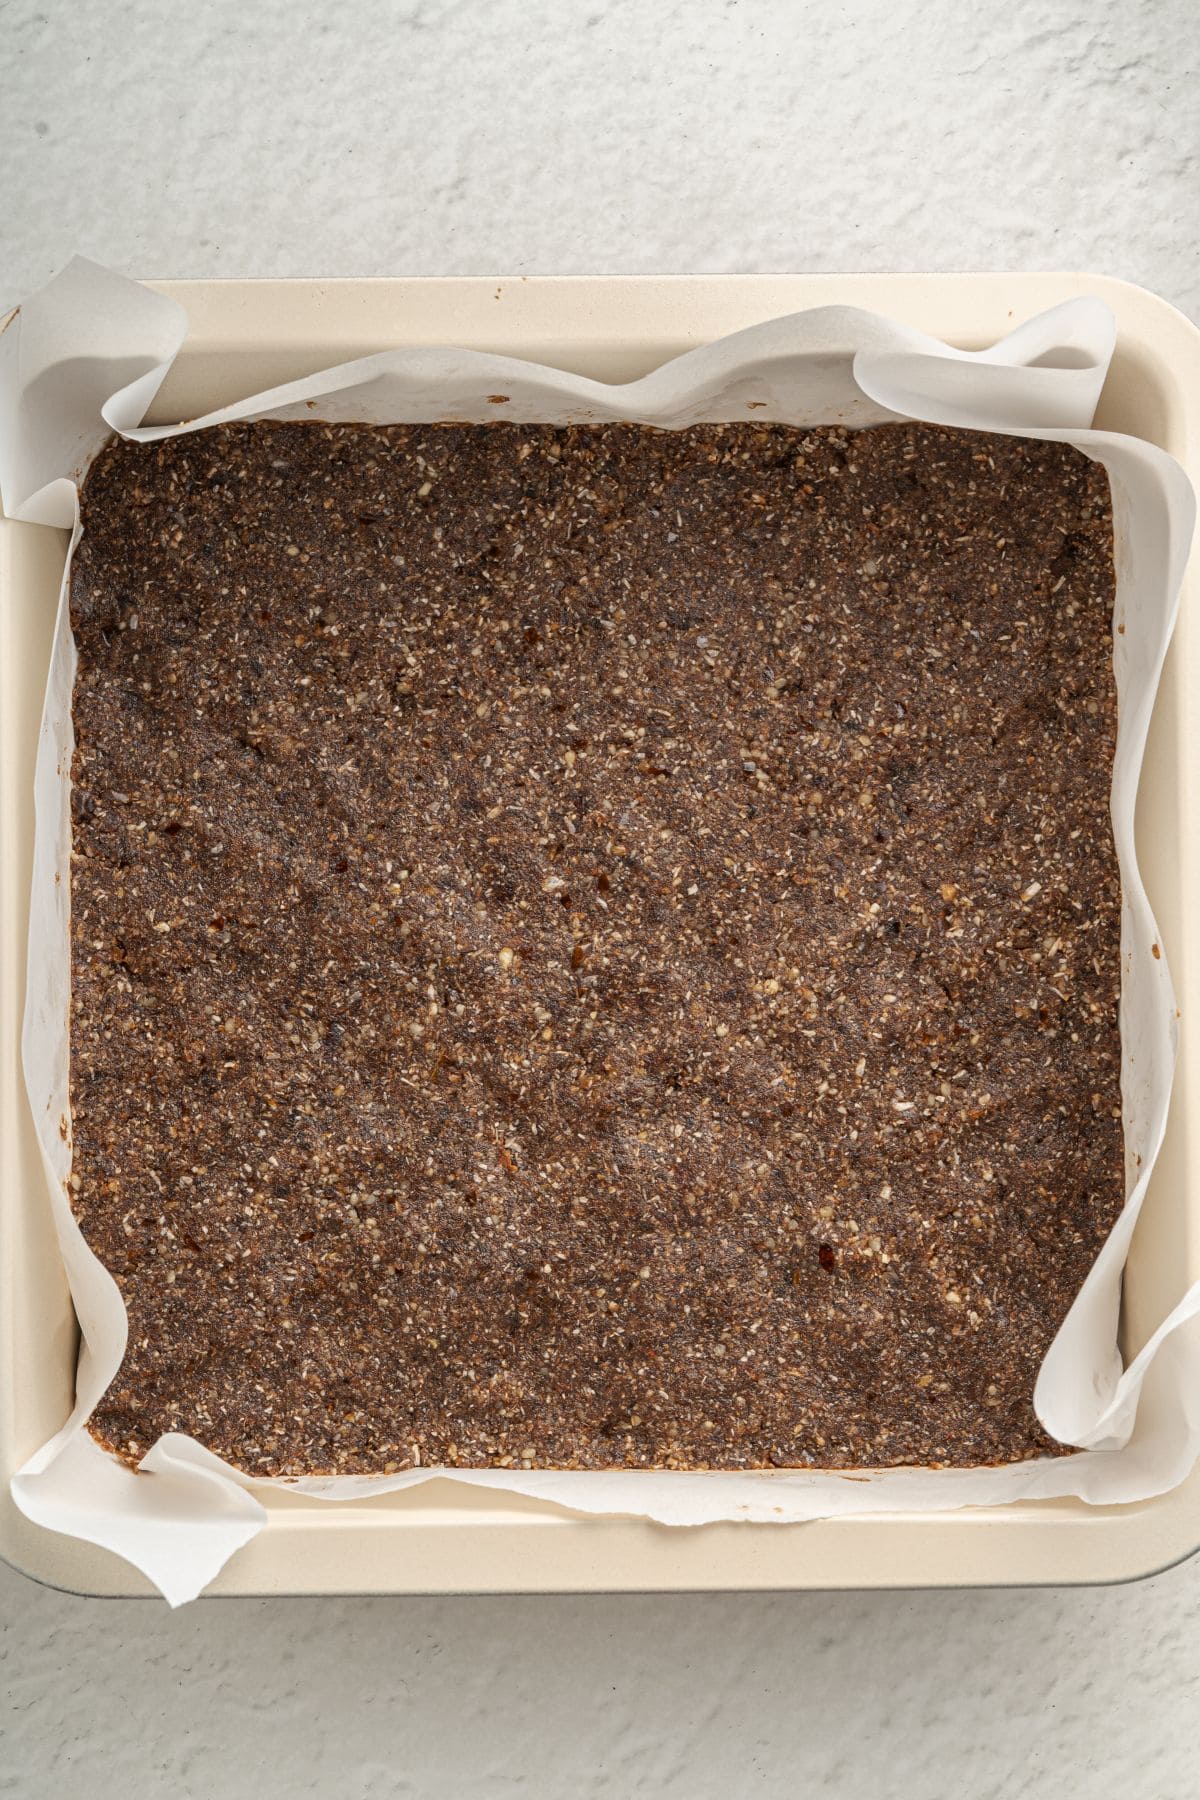
- Add the dates, cacao powder, and shredded coconut. Pulse again to combine all the ingredients. The result should be a grainy but sticky mixture. If it’s still not sticky, add a few drops of water and pulse again. This will add moisture to the dates and solve the issue.
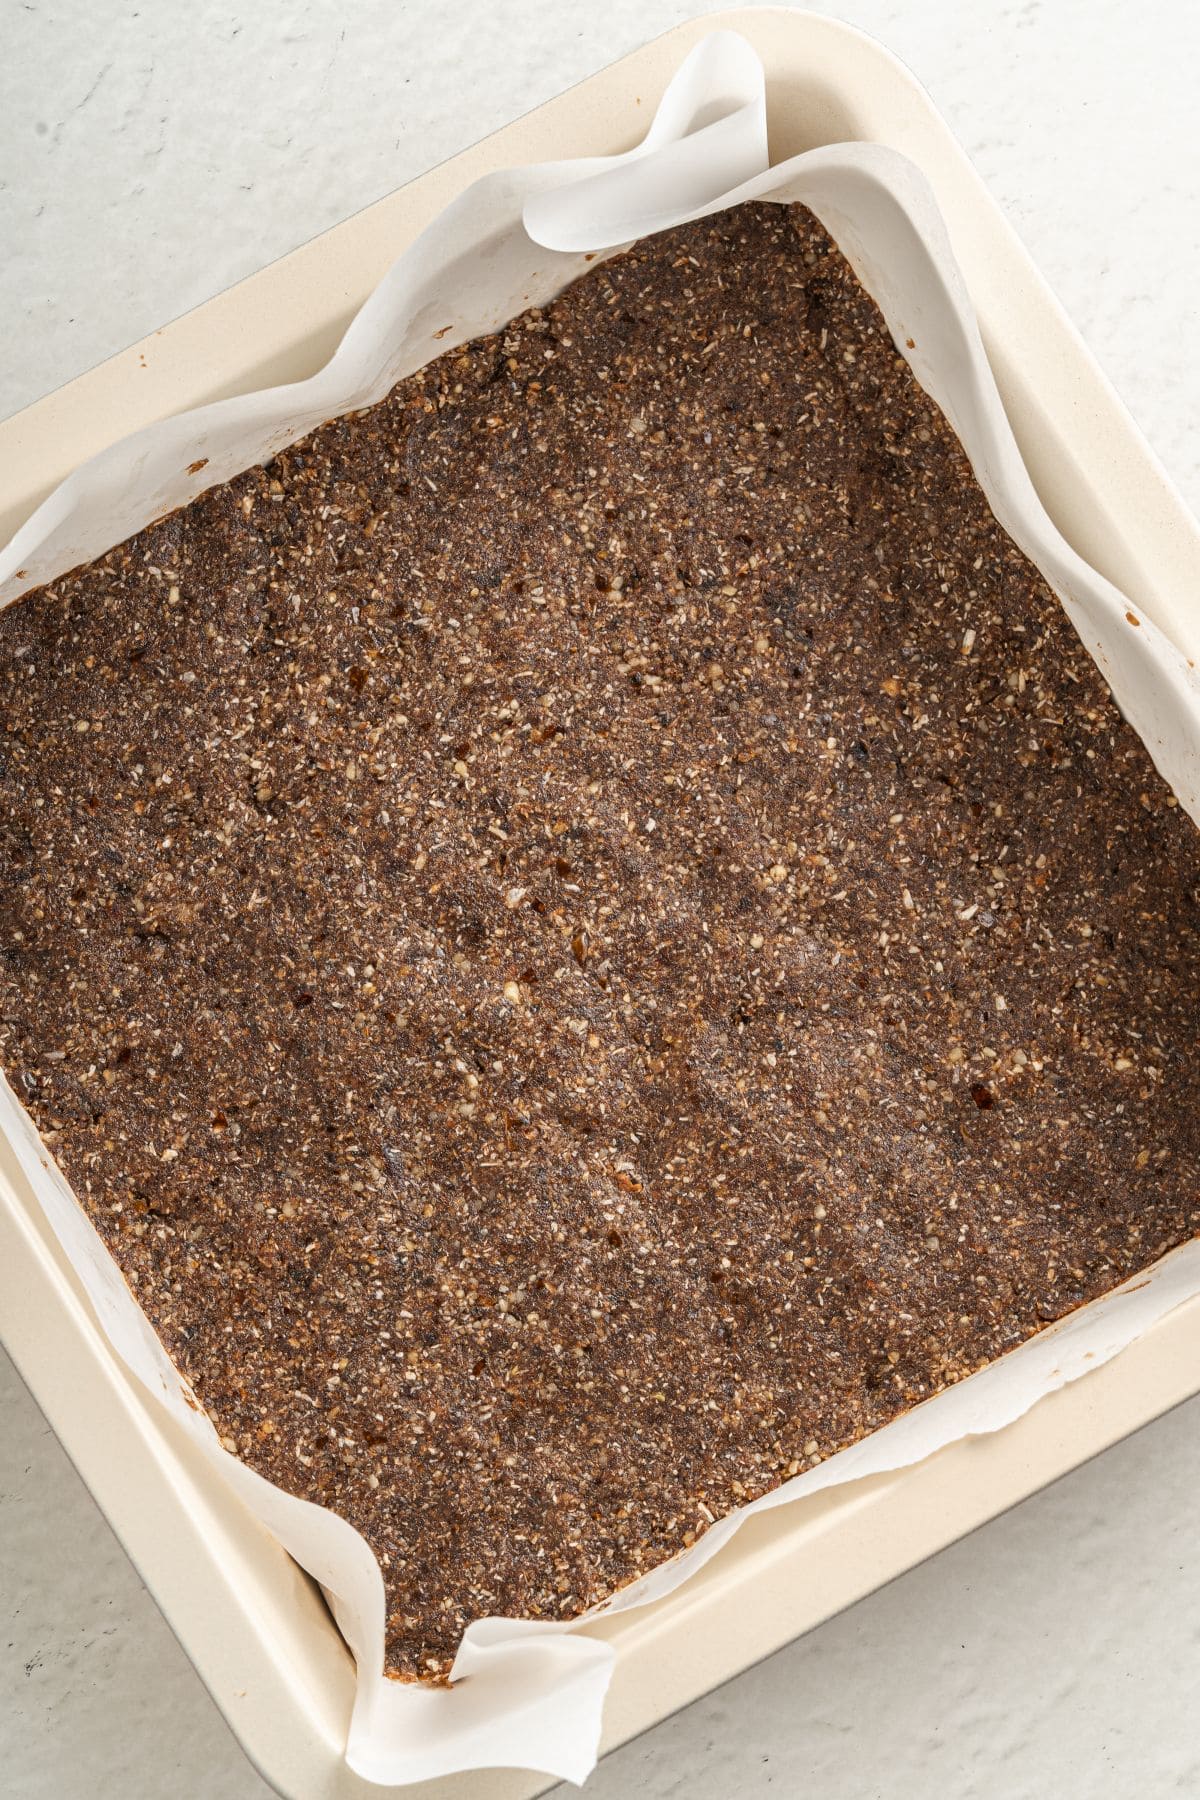
- Line an 8″ square pan with parchment paper. Transfer the base mixture into the prepared pan and press it down to cover the bottom of the pan evenly.
Make the filling:
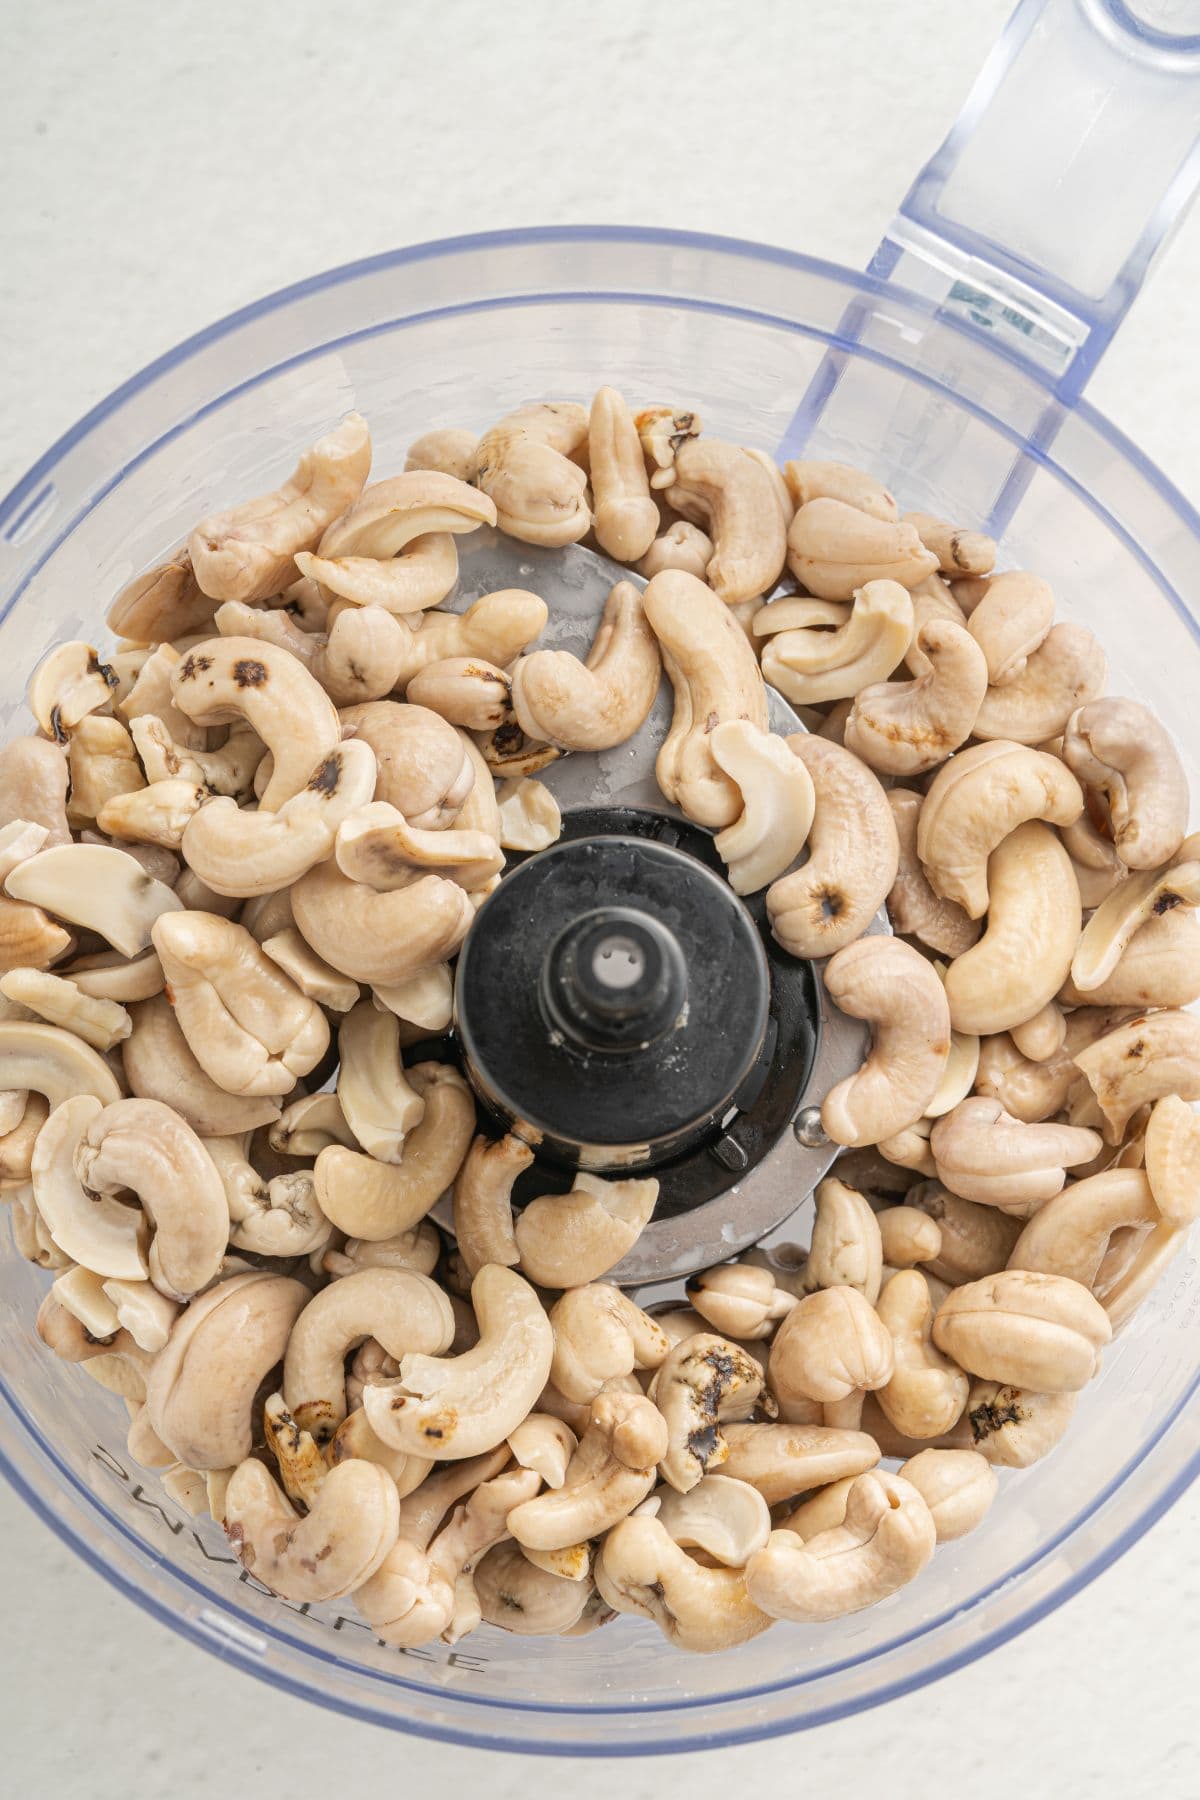
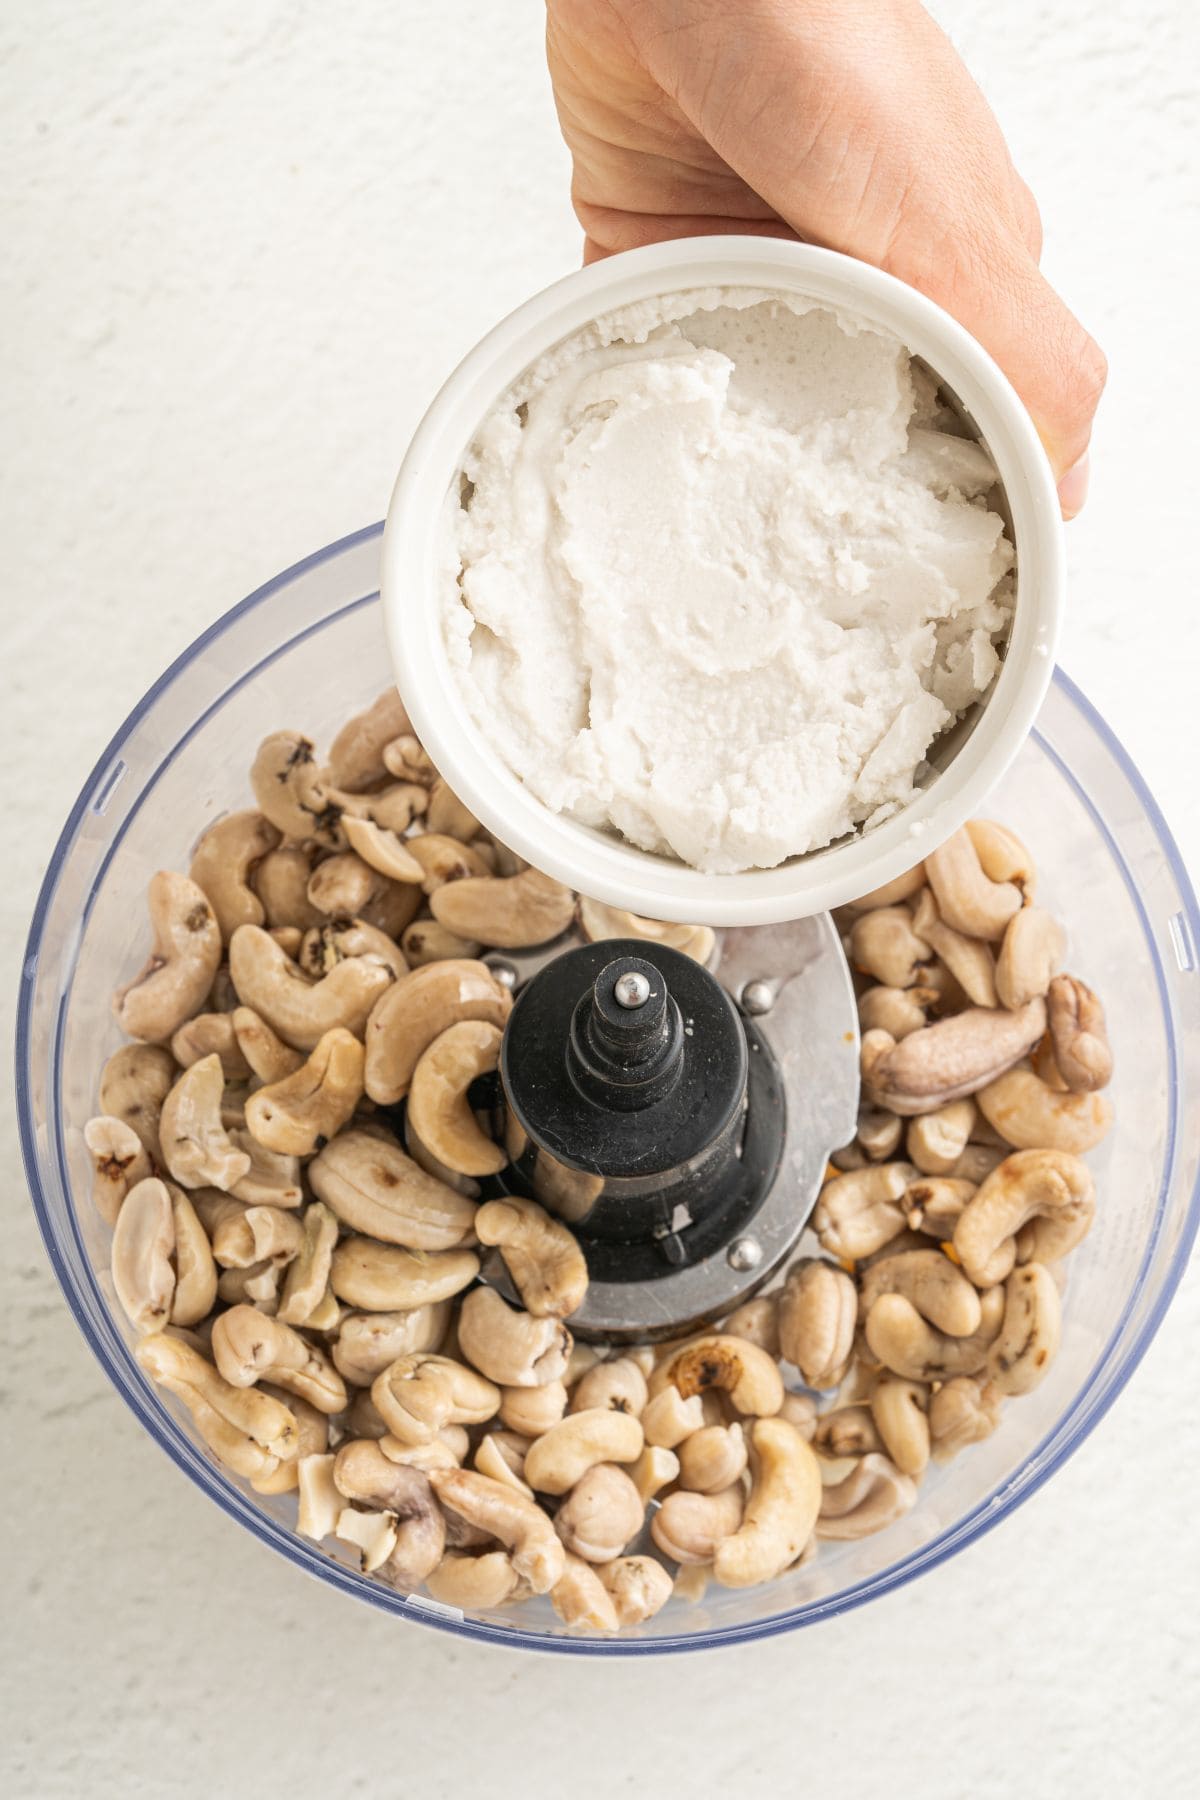
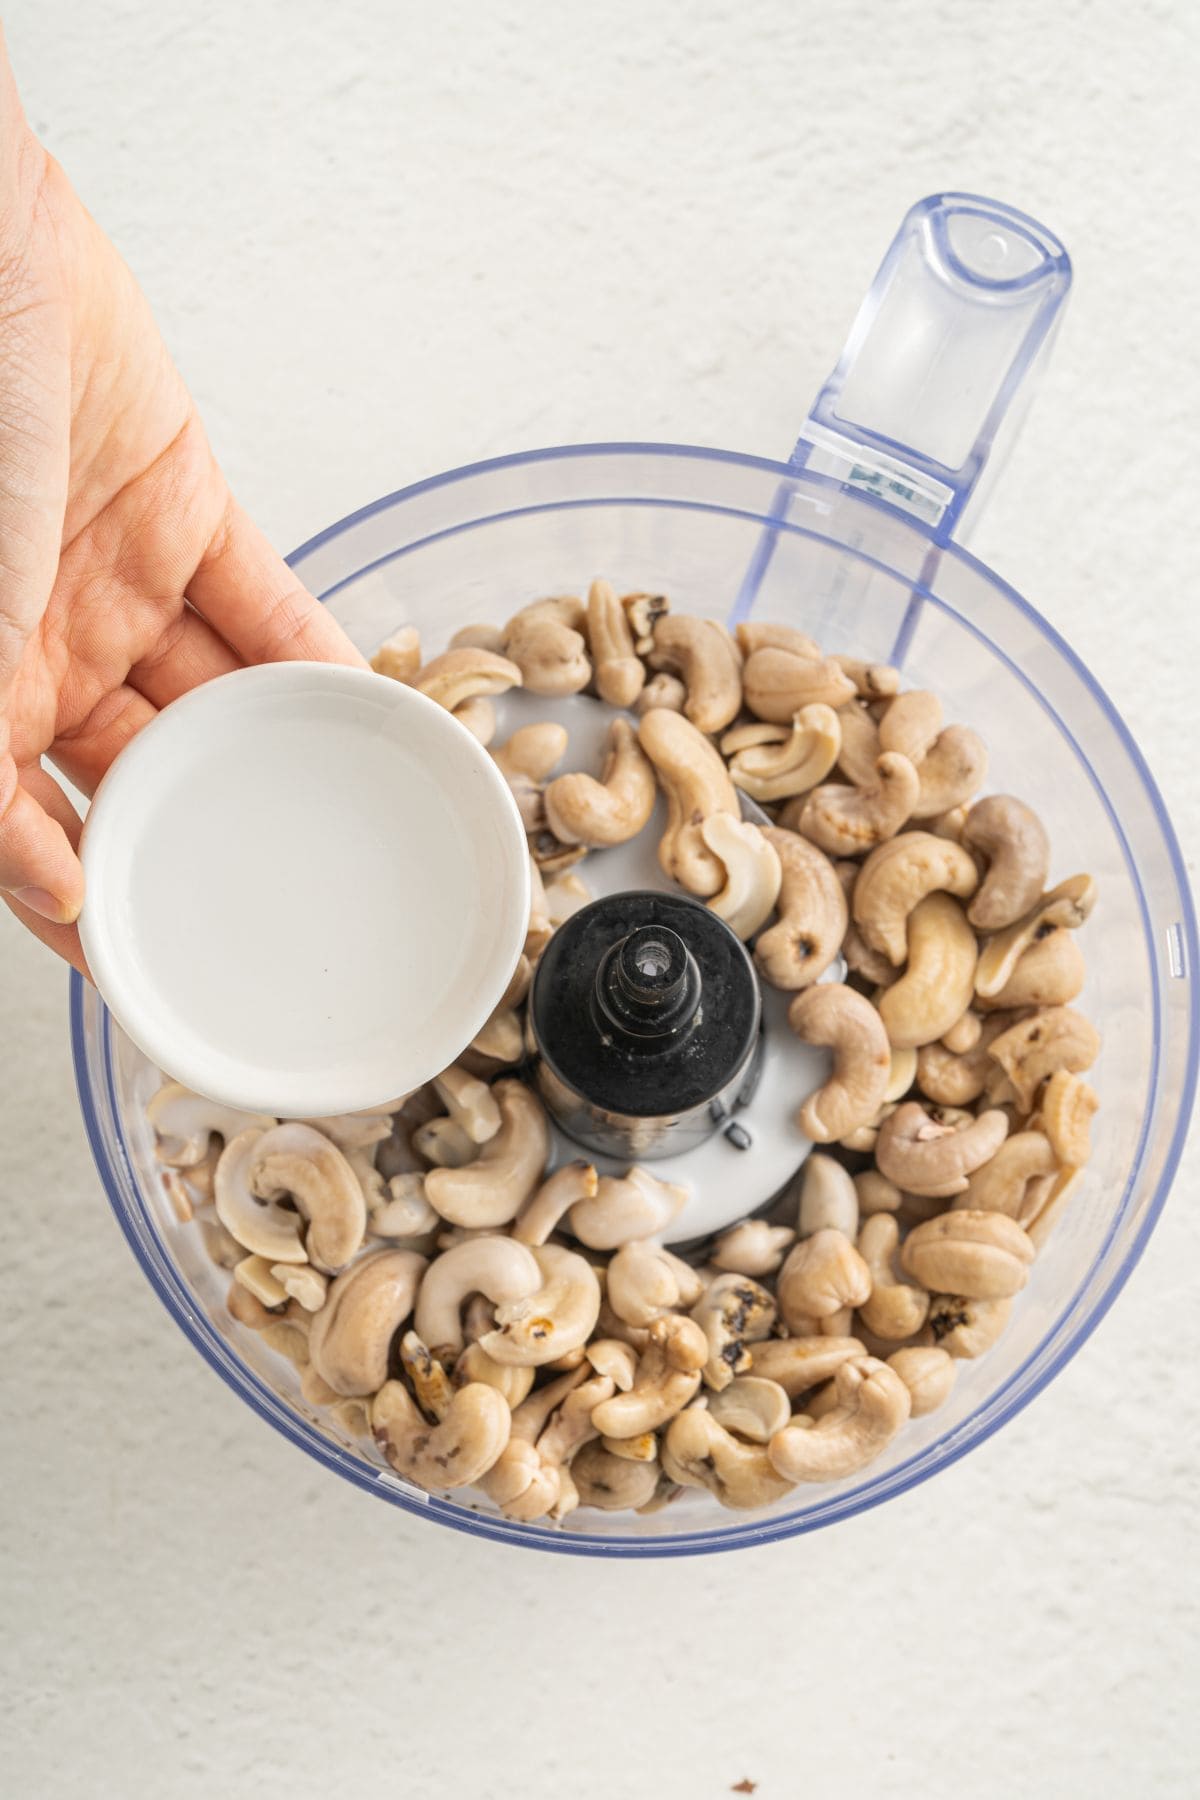
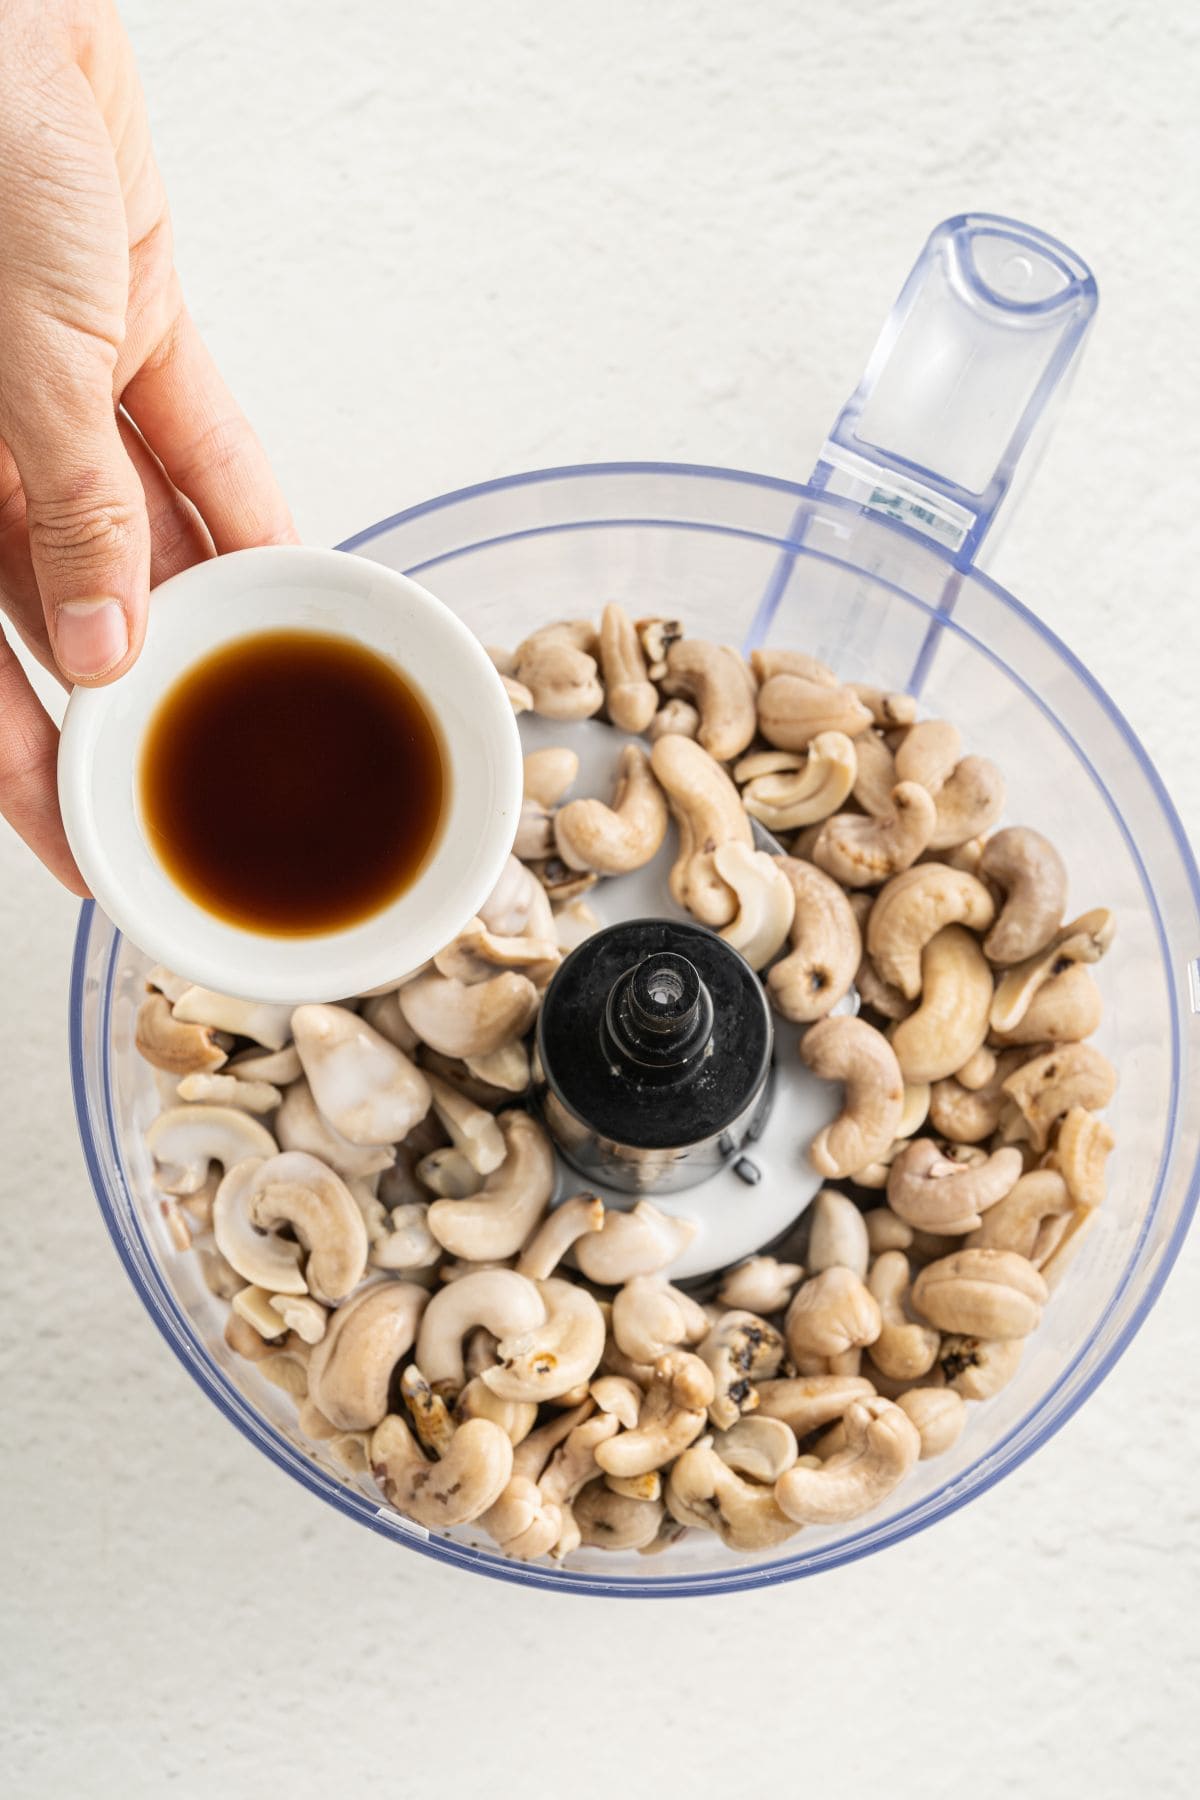
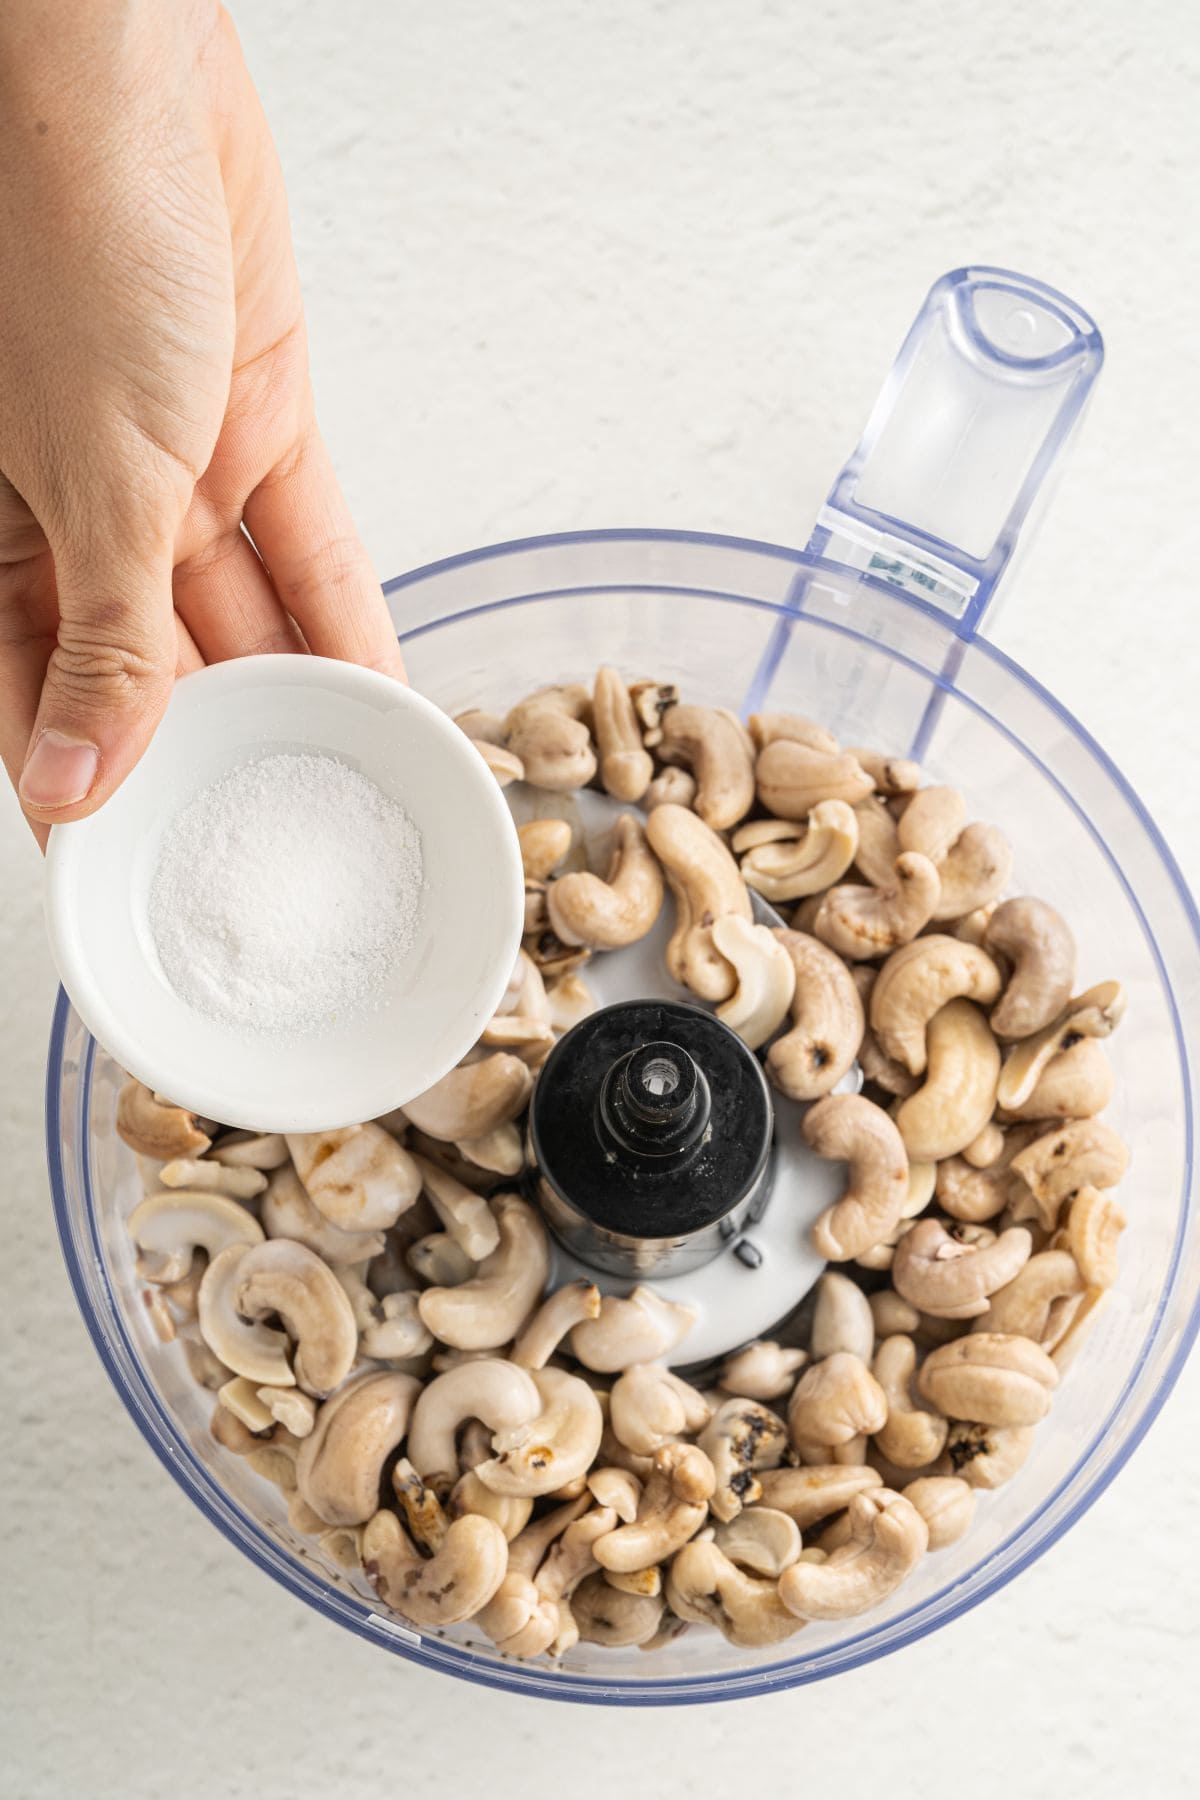
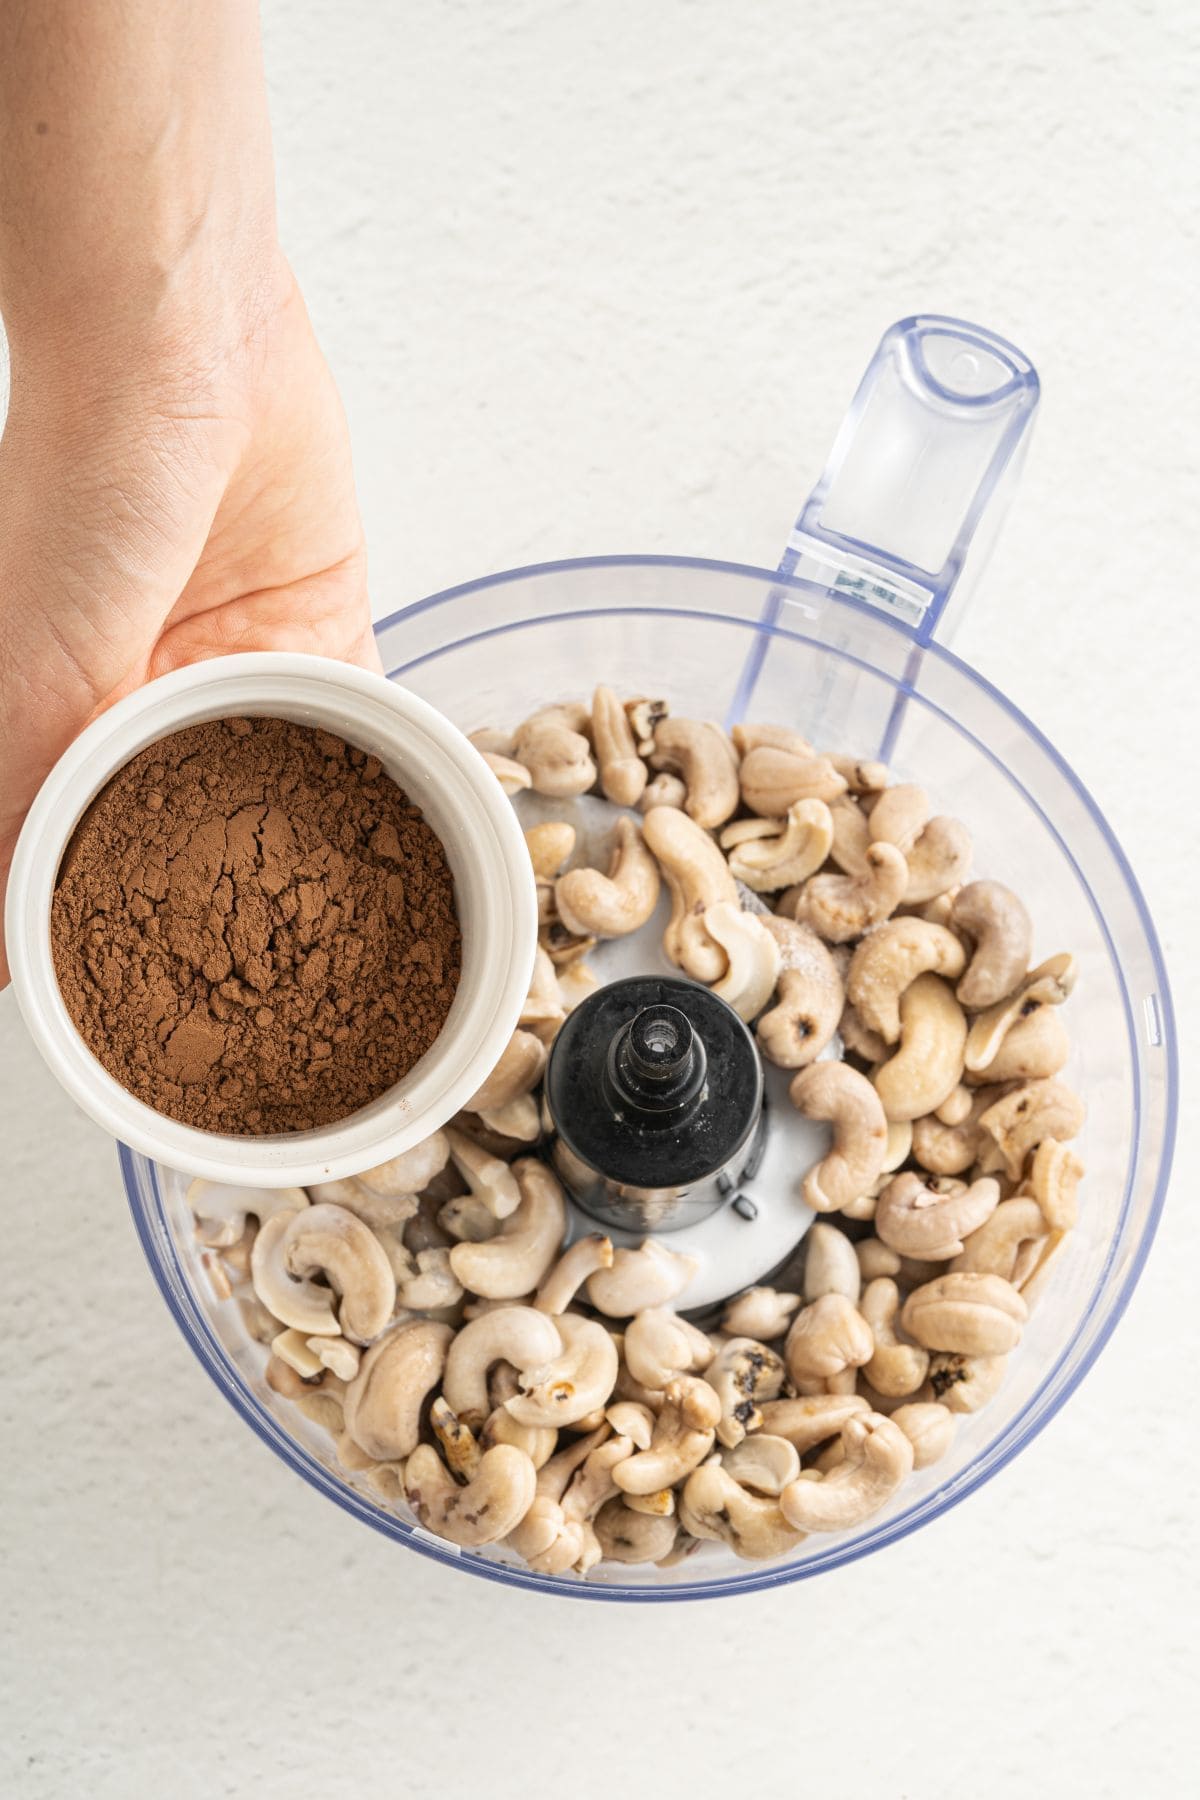
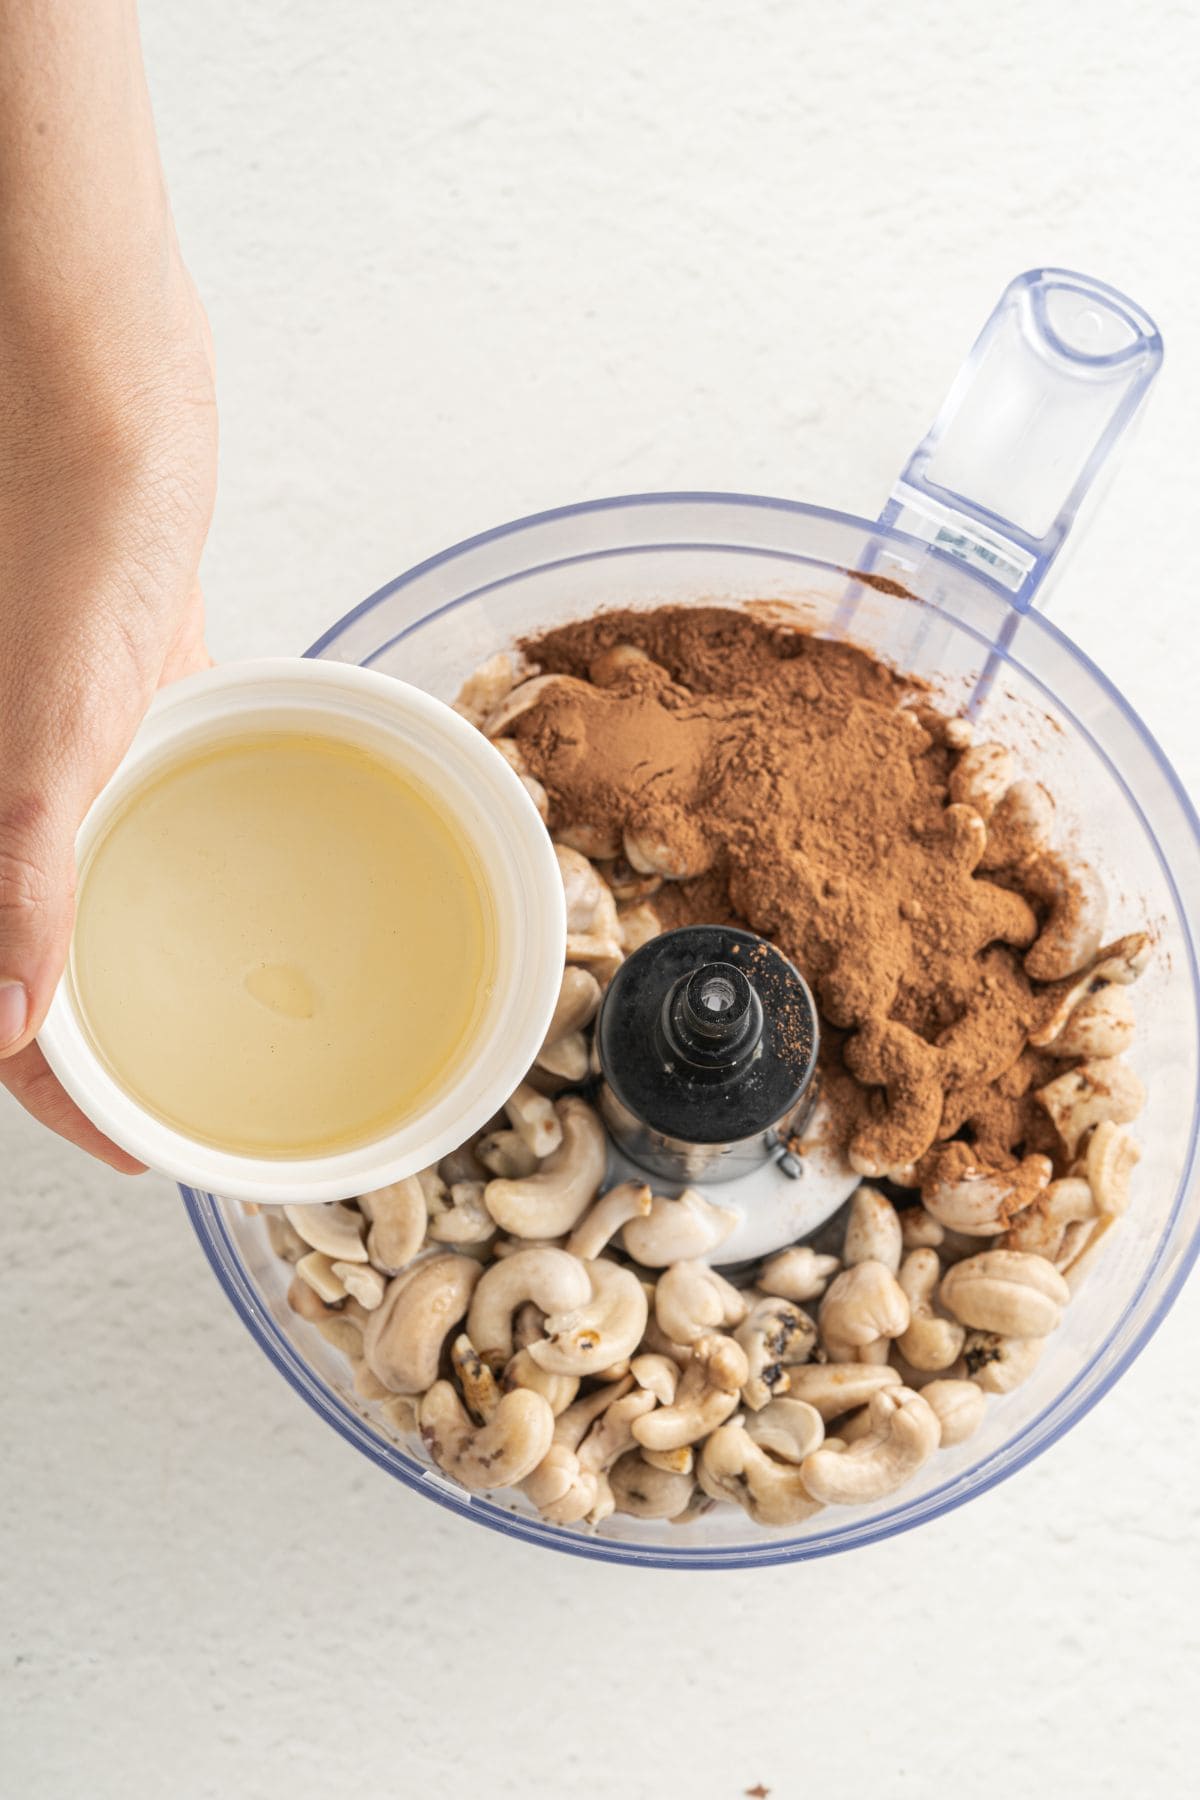
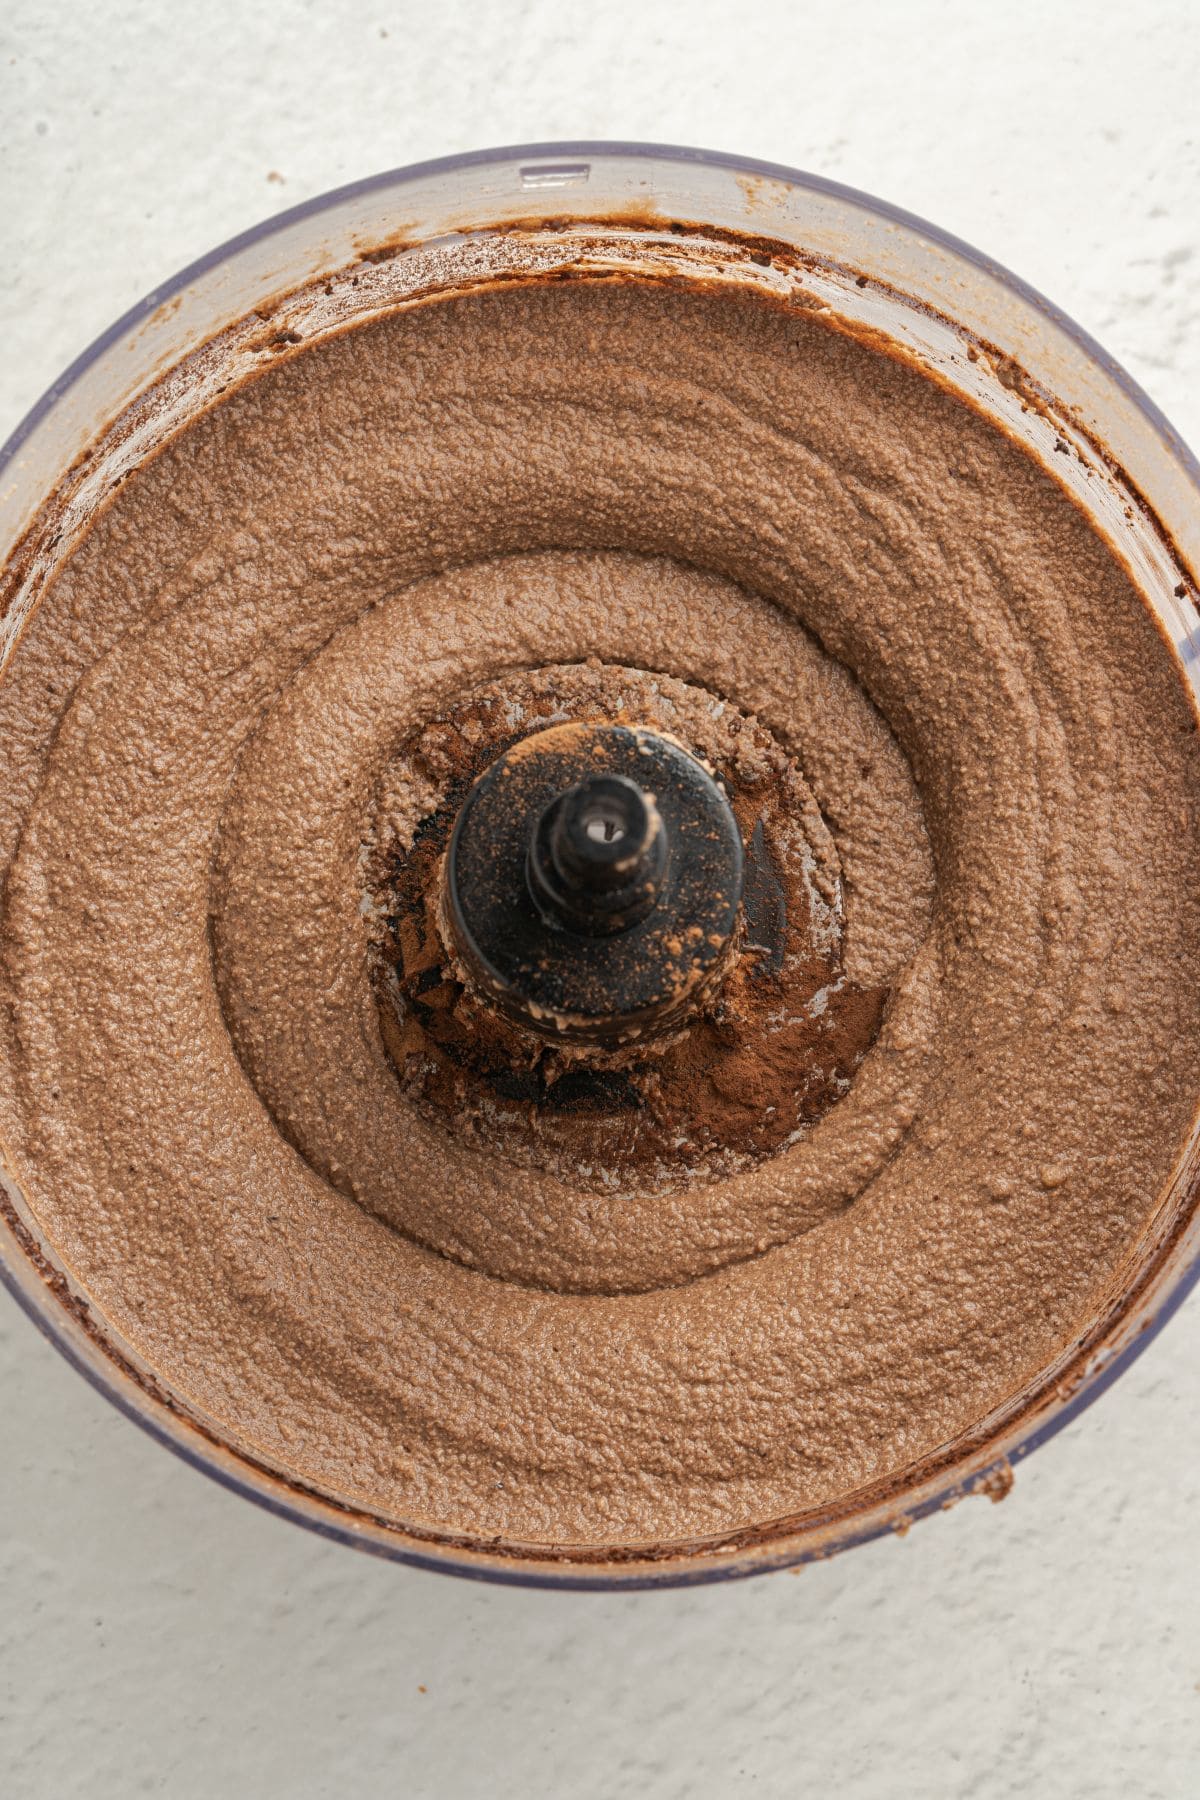
- Place the soaked and drained cashews, liquid stevia, vanilla extract, salt, melted coconut oil, canned coconut milk, and cacao powder in a food processor or blender. Pulse until completely smooth. A blender or high-speed food processor will produce a softer texture than a regular food processor.
- Pour the filling over the prepared base and spread it out.
- Refrigerate for at least 3 hours or until set. You can speed up this process by freezing the filling for 1 hour then moving it to the fridge to set.
Make the pistachio praline:
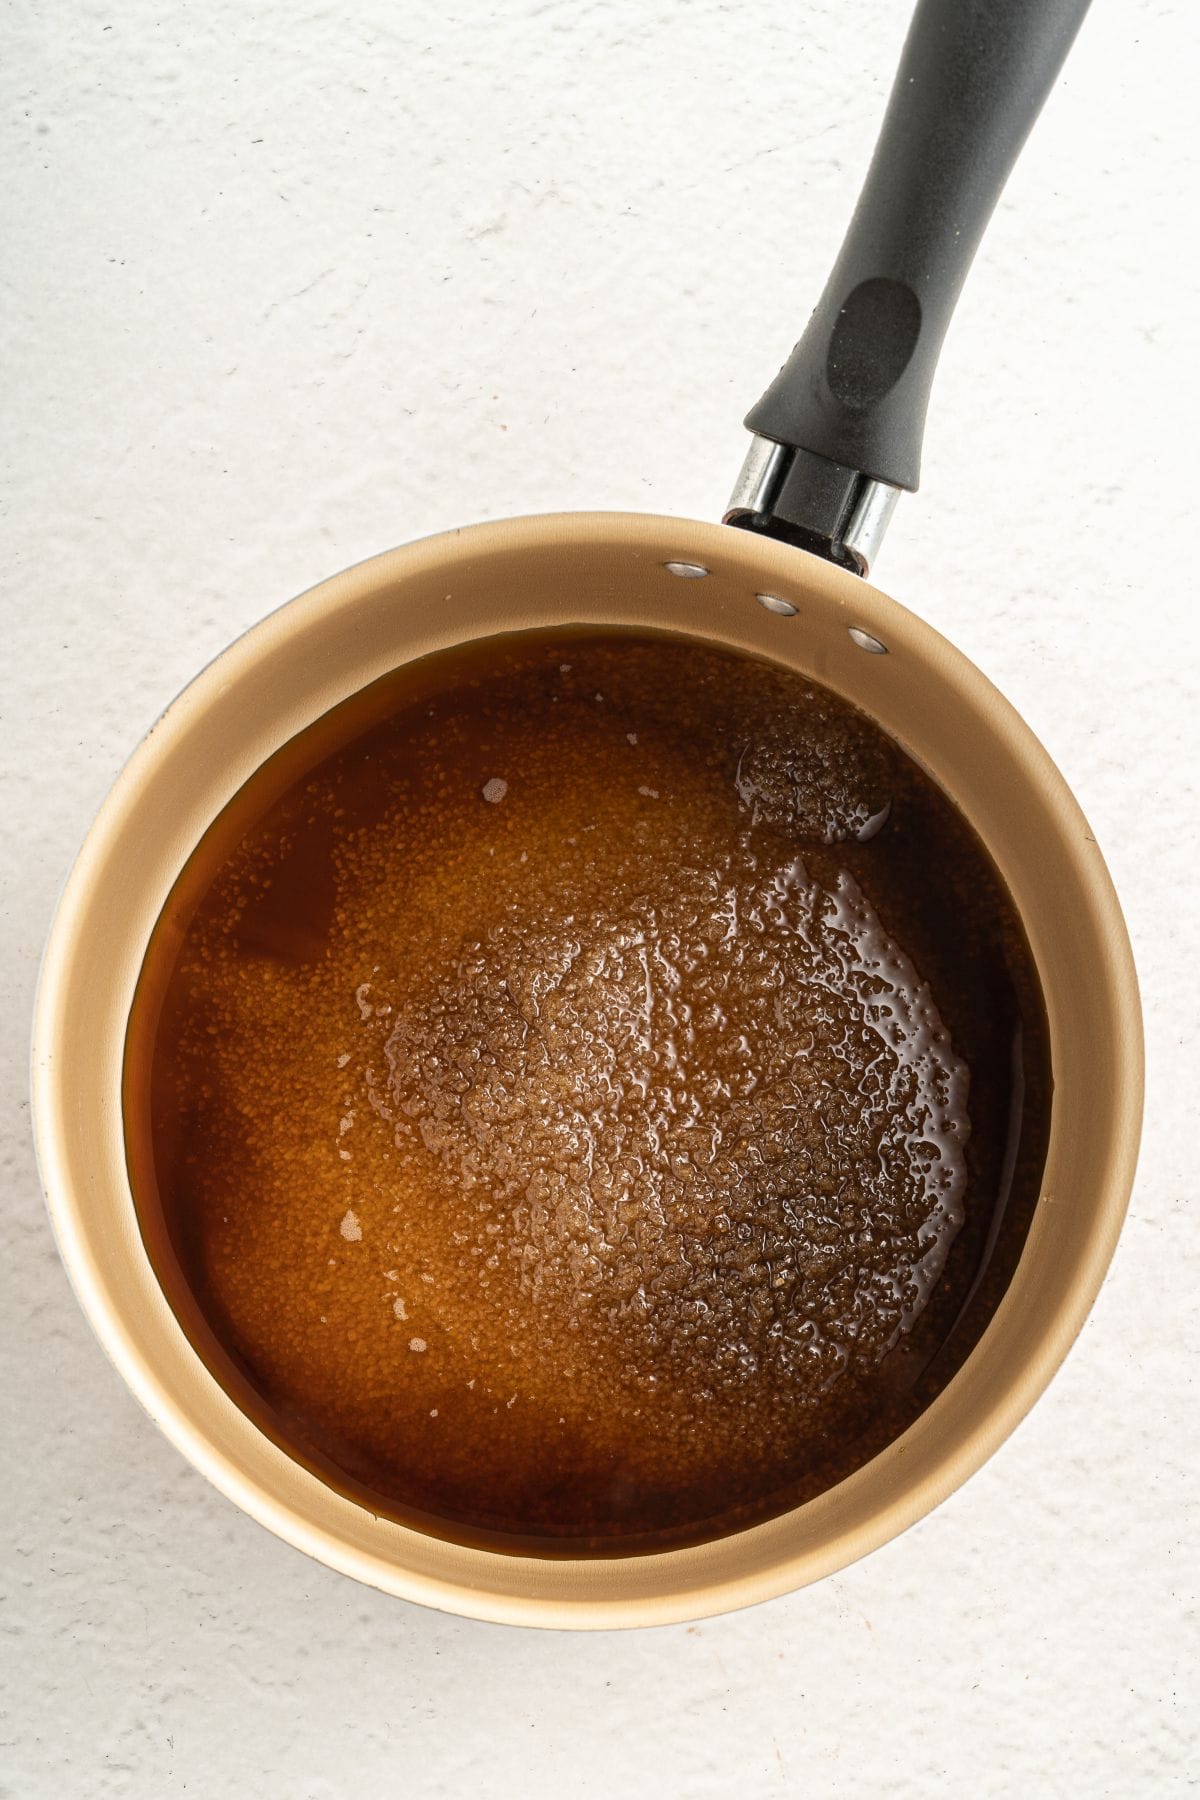
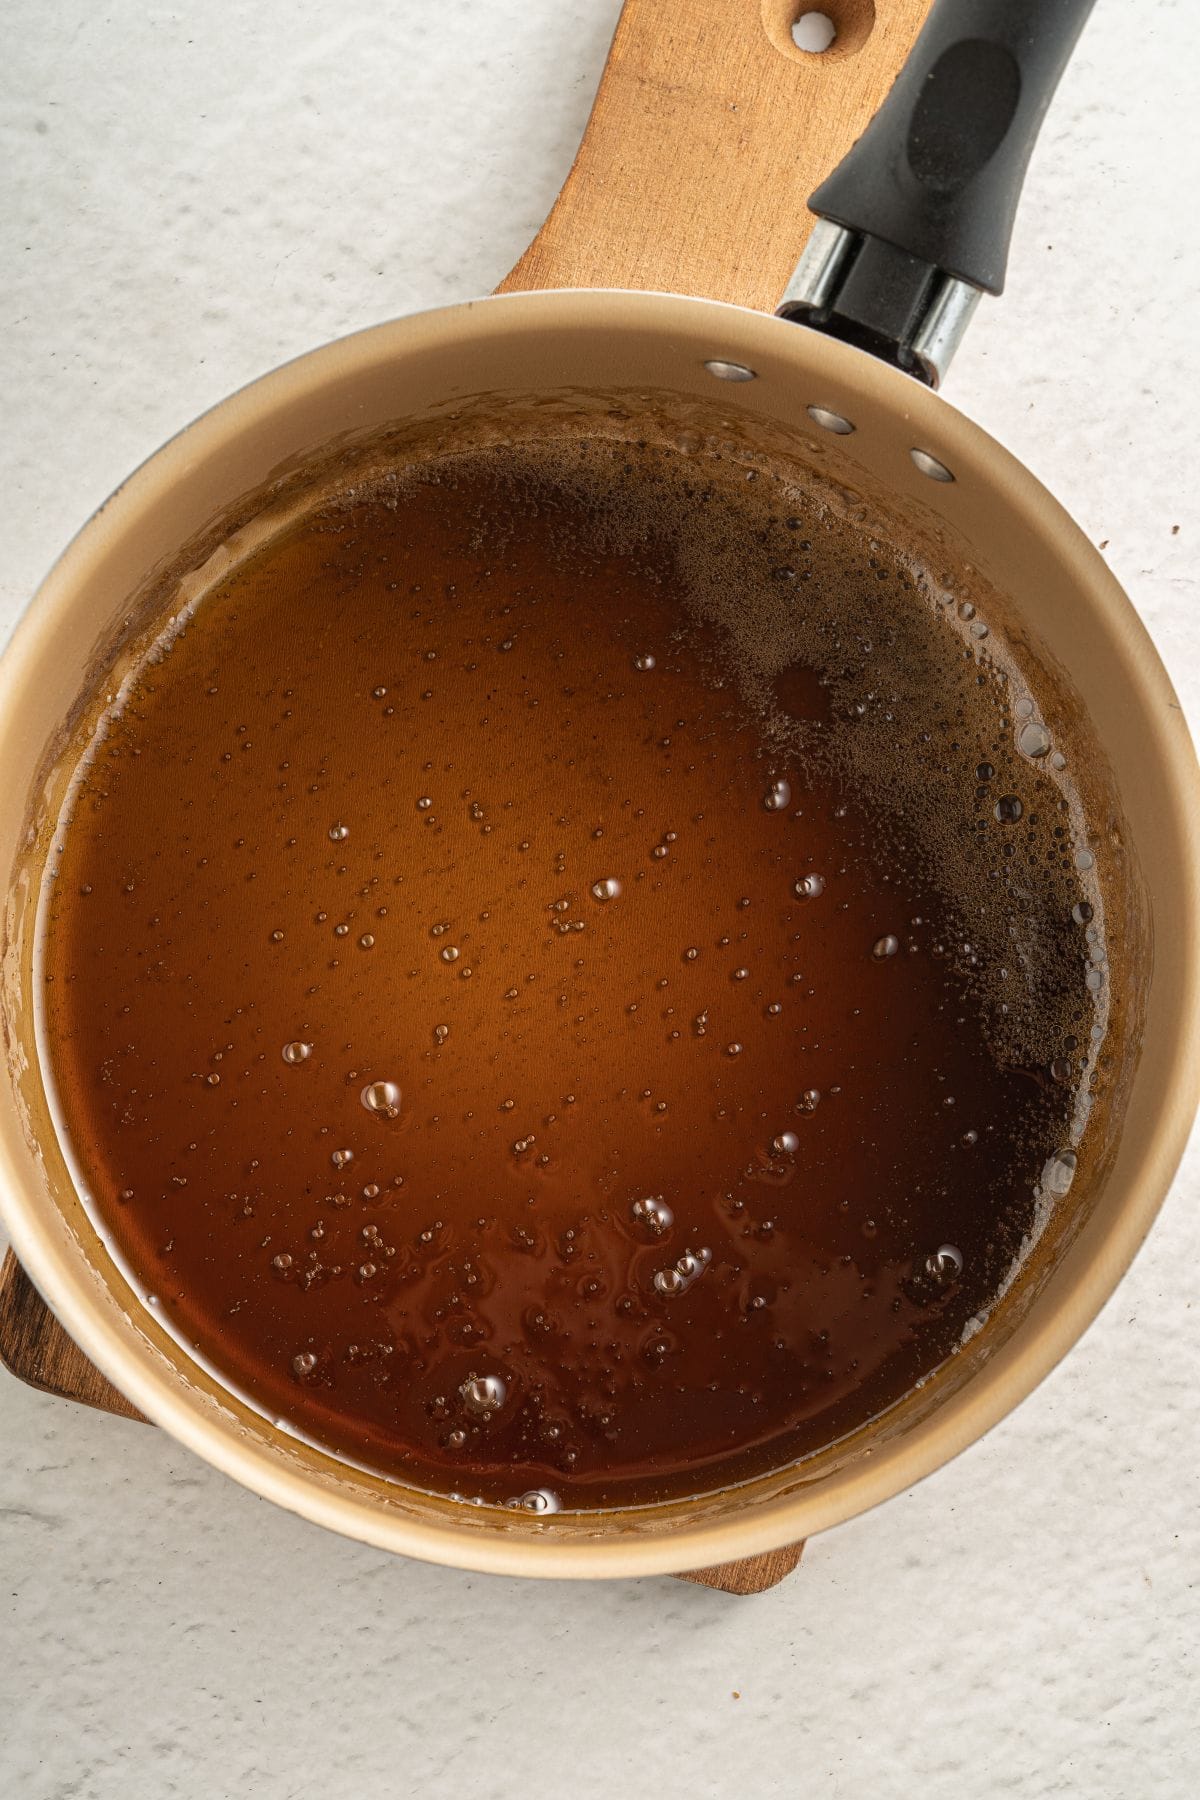
- Mix the brown sugar and water in a small pot. Make caramel by placing the pot over medium heat until it turns amber brown and thickens.
- Once you notice thick bubbles on top of the caramel, leave it for 1 more minute then remove it from the heat.
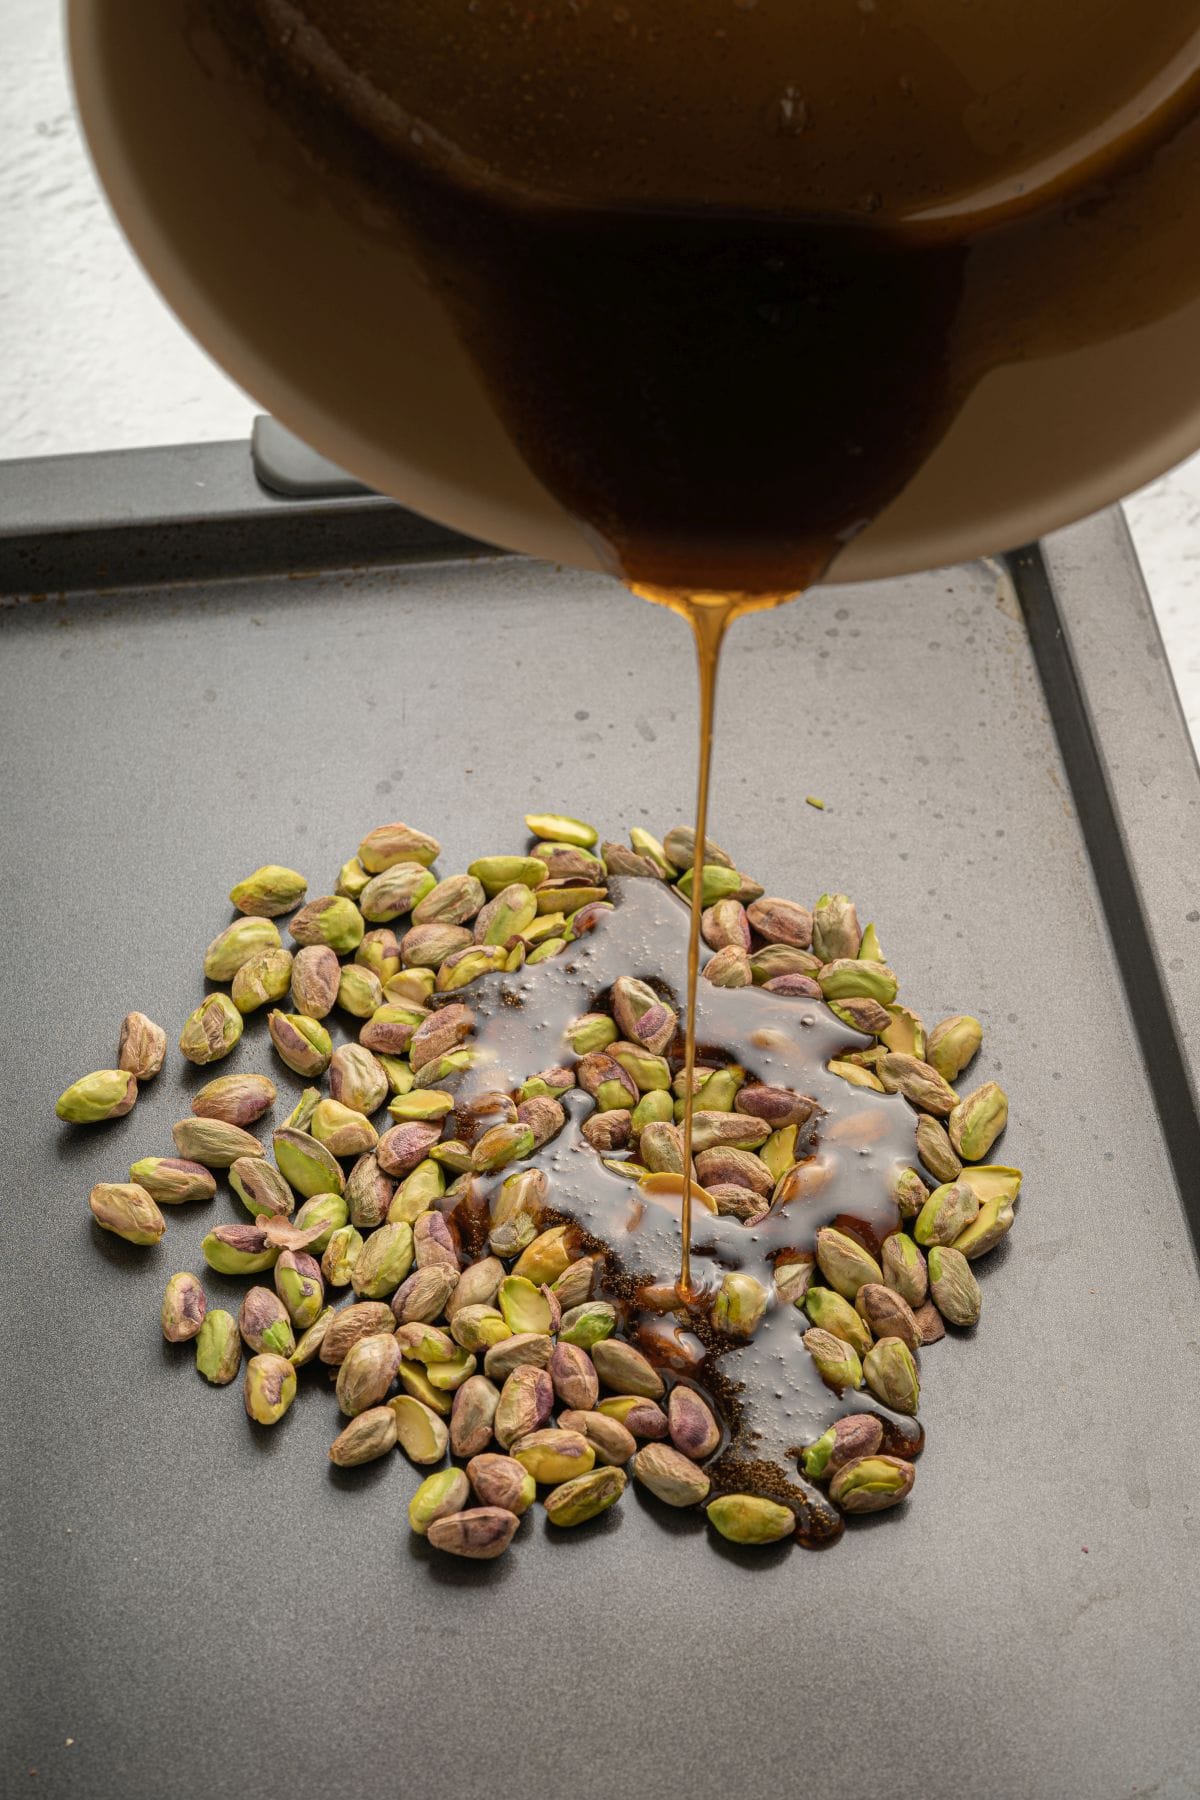
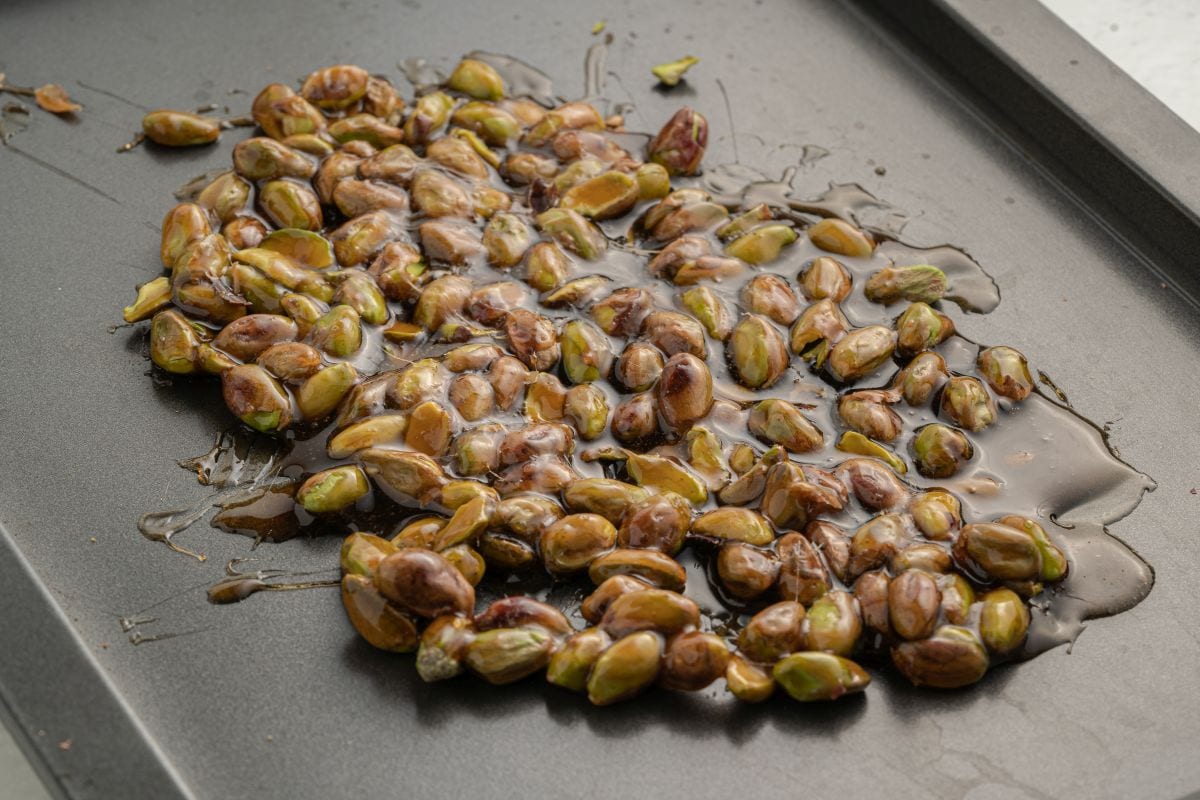
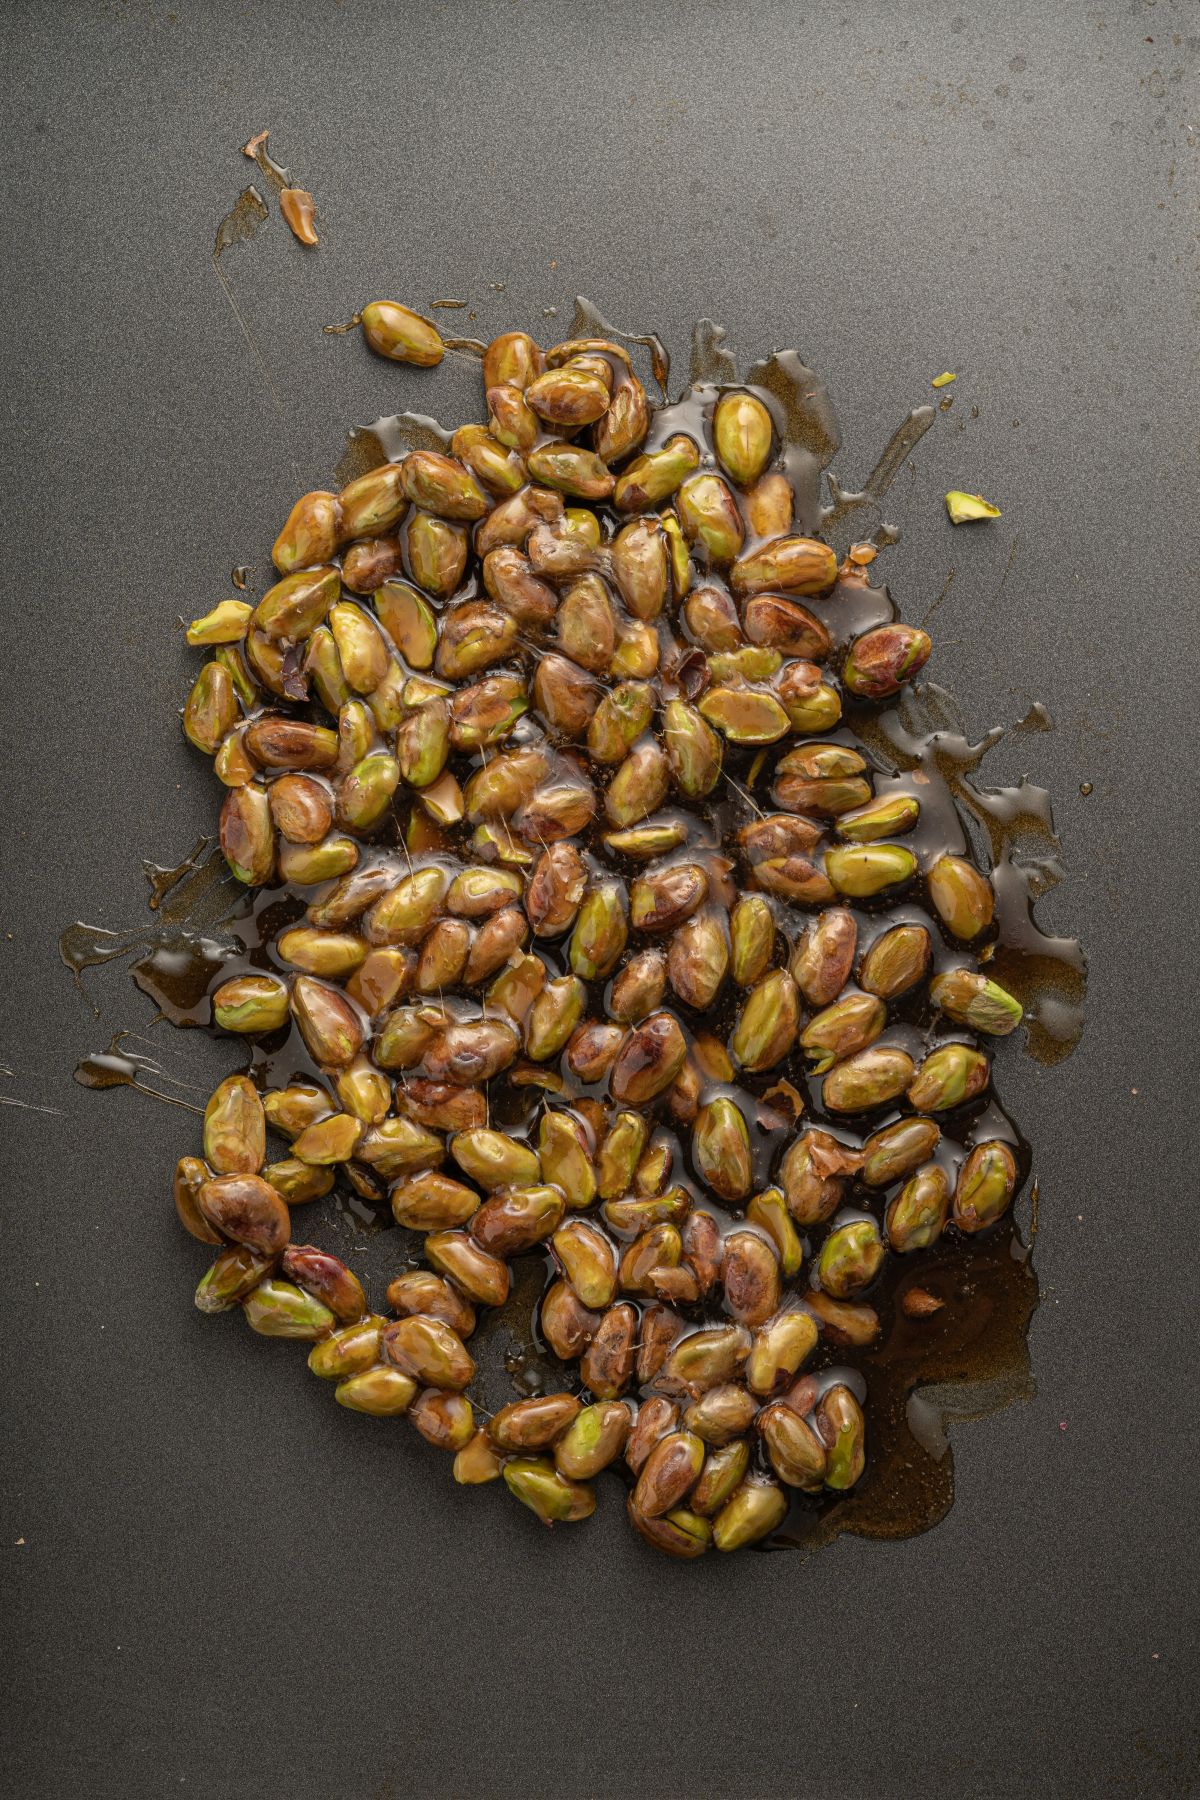
- In the meantime, place the pistachios on a non-stick tray or a tray covered with a baking mat.
- When the caramel is ready, pour it over the pistachios to coat them all. Work quickly because the caramel will harden fast.
- Allow the caramel to harden for 20 to 30 minutes.
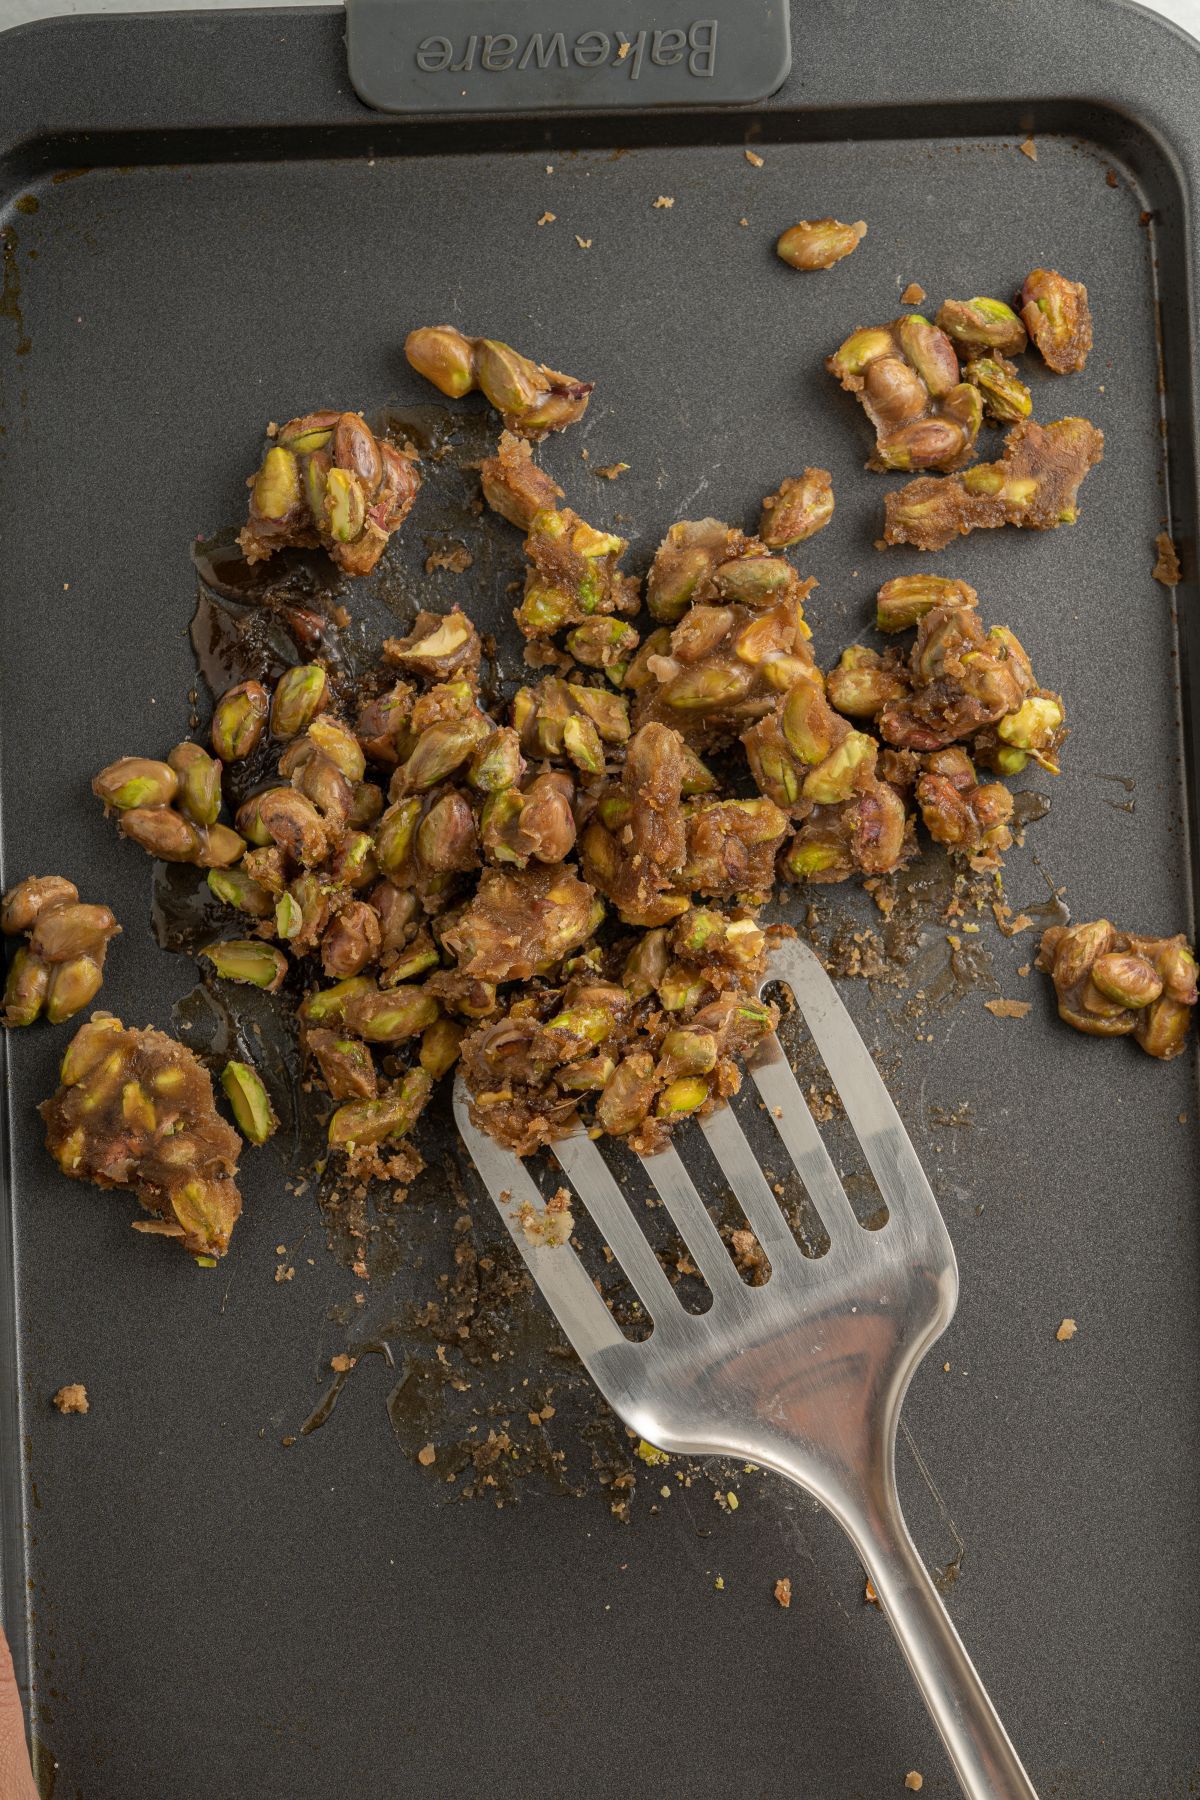
- When the pistachios are hard enough, use a spatula to lift the caramelized pistachio pieces.
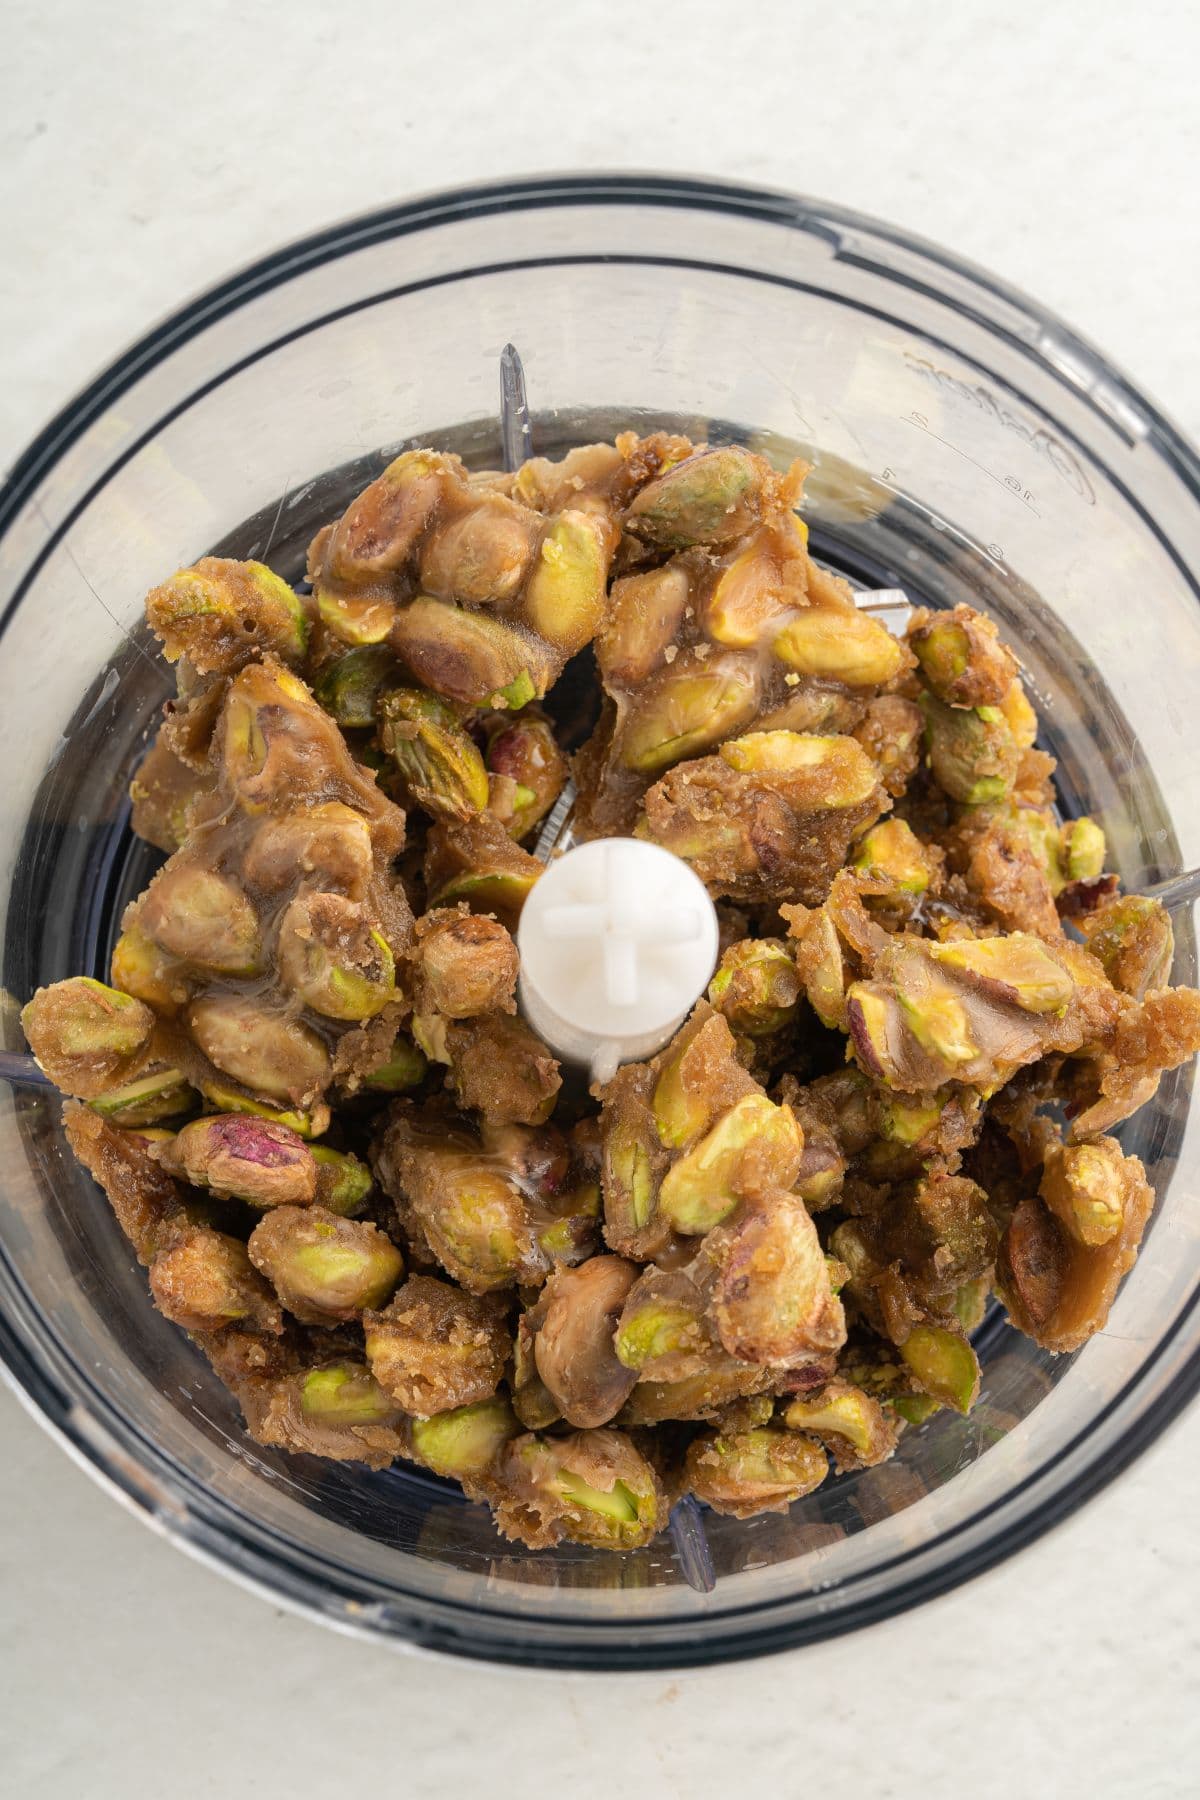
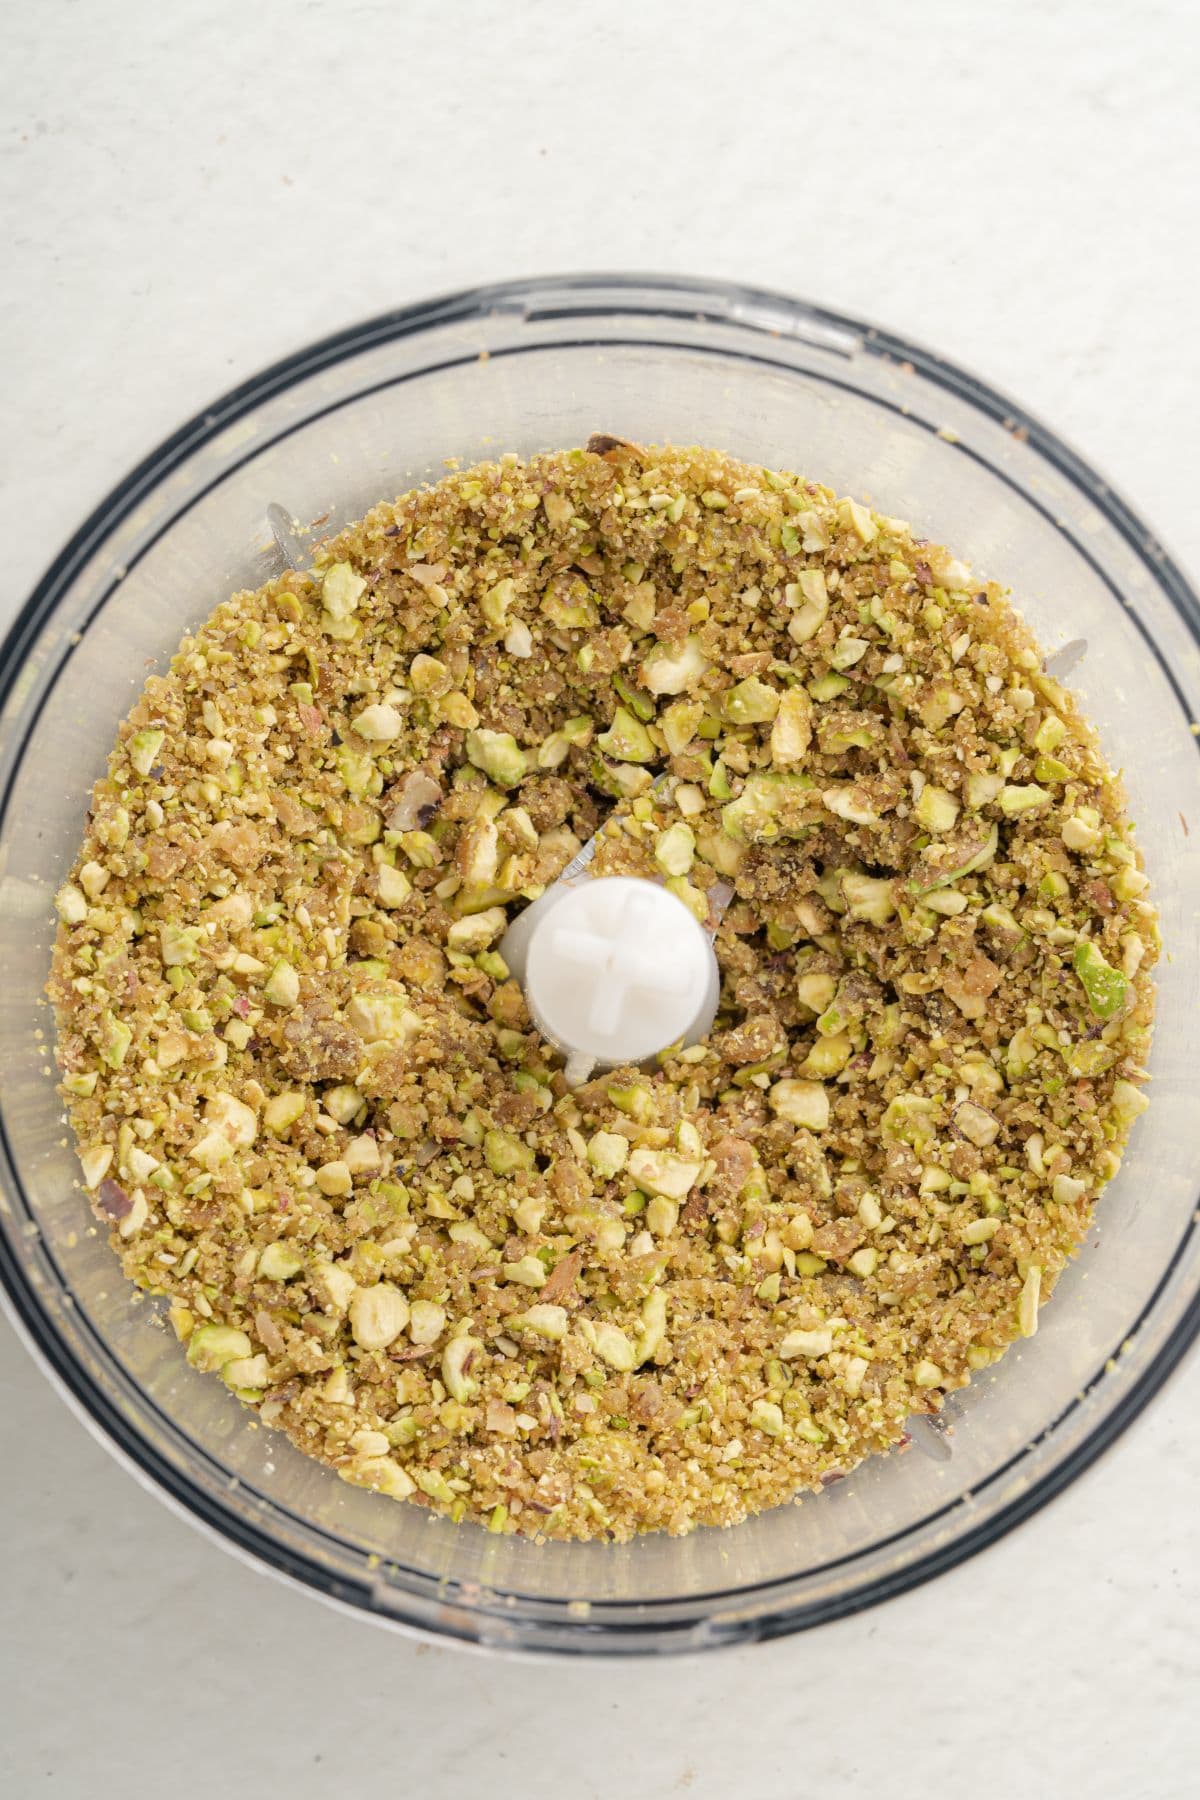
- Place the pieces in a food processor and blend until the praline reaches your desired consistency.
- Slice the no-bake dessert and garnish with the pistachio praline.
Tips and Variations for this Recipe
Follow these tips and variations for the best no-bake chocolate and pistachio slices:
- Make sure your dates are moist and sticky. If they are dry, soak them in warm water for 20 minutes then drain off the excess water to get sticky dates.
- Measure the 1/2 cup of dates with the dates pitted and packed.
- Replace the liquid stevia with any other liquid or powdered sweetener as desired.
- Substitute pecans or almonds for the walnuts.
- For an extra nutty flavor, add some almond extract to the filling.
- For a spicier flavor, add a pinch of ground cinnamon or cumin to the filling.
FAQs
Does this recipe work for any special diets?
This recipe is dairy free, gluten free, and vegan.
How do I store leftover slices of the dessert?
Cover any remaining dessert slices and store them in the refrigerator.
Can I freeze these chocolate and pistachio slices?
Yes, you can store this dessert in an airtight container in the freezer. Thaw it in the fridge for a couple of hours before serving.
Other Dessert Recipes
- Easy Protein Healthy Donuts
- Vegan Apple Cake with Streusel Topping
- Almond Flour Chocolate Chip Muffins
- Easy Healthy Peanut Butter Cups

No-bake Chocolate and Pistachio Slices
This recipe for no-bake chocolate and pistachio slices will satisfy your sweet tooth in a healthy way.
Ingredients
Base
- ½ cup packed pitted dates
- 1 cup walnuts
- ⅓ cup shredded coconut
- 1 tbsp cacao powder
Filling
- 2 cups raw cashews, soaked
- 1 cup canned coconut milk
- 1 tsp liquid stevia
- 1 tsp vanilla extract
- 4 tbsp cacao powder
- ¼ tsp salt
- ¼ cup melted coconut oil
Pistachios Topping
- ⅔ cup peeled pistachios
- ⅓ cup brown sugar (any kind of sugar will work)
- ¼ cup water
Instructions
- Place walnuts in a blender or food processor and pulse until a ground consistency. Then add dates, cacao powder, and shredded coconut. Note 1: Dates should be moist and sticky. If yours are dry, soak them in warm water for 20 minutes, then drain excess water until you get a sticky dates puree. Note 2: the ½ cup of dates was measured with dates pitted and packed. Then, pulse again to combine all the ingredients. The result should be a grainy but sticky mixture. Tip: if it is still not sticky, add a few drops of water and pulse again. This will add moisture to the dates and solve the issue.
- Take an 8’’ square pan and line it with parchment paper. Transfer the base mixture into the prepared pan and press it down to cover it evenly.
- To make the filling: place soaked and drained cashews, liquid stevia, vanilla extract, salt, melted coconut oil, canned coconut milk, and cacao powder in a food processor or blender and pulse until completely smooth. In my experience, blenders and high-speed food processors achieve a softer texture than regular food processors. Note 3: Canned coconut milk; I’ve spooned first the solids of a 14oz can and filled the rest of the cup with the liquid part.
- Pour the filling over the prepared base, extend it evenly. Then, refrigerate for at least 3 hours or until completely set. This process can be sped up by placing the dessert in the freezer for one hour and then moving it to the fridge to set.
- Prepare the pistachio praliné: To make the pistachio praline, you need to make caramel first. So, add brown sugar and water into a small pot and place it over a medium heat stovetop until it turns amber brown and thickens. Once you notice thick bubbles on top of the caramel, leave it for one more minute and remove it from heat. In the meantime, place pistachios over a tray. Using a non-stick tray or covering it with a baking mat will be helpful in the next step. Once your caramel is ready, pour it over the pistachios and coat them evenly, you’ll need to be quick as the caramel will harden fast. Let it harden for 20 to 30 minutes.
- Once pistachios are hard enough, use a metal spatula to lift the caramelized pistachio pieces. Add those pieces into a food processor to make the praline. Blend until it gets to your desired consistency.
- Slice your No-Bake Desser and garnish with the prepared pistachio praliné.
Notes
Tips
Recipe Notes
This no-bake dessert combines a mois and sweet crust with a smooth, soft chocolate filling. But that's not it; on top of that, you have a praline made out of pistachios which provides crunchiness and sweetness to this mouthwatering equation. ?