peanut butter…
it’s a long time fave of mine. Even with all of the other nut and seed butters around in the stores now …almond, cashew, almond cashew, hazelnut, coconut almond cashew, pumpkin, and sunflower… I think I would still say that plain old reliable peanut butter is my winner. It just has a place in my heart. As a kid, peanut butter and jam sandwiches were a staple, and as an adult, even though I don’t really make PB & J sandwiches on the regular, I still do incorporate peanut butter into my weekly eats, no fail.
I knew it was time for another frozen dessert recipe on the blog, after all it is summer and that’s what the people want to see! So, I reached for my long time love, PB, and decided to make something cold, creamy, and incredibly delicious. Oh, and still healthy of course!
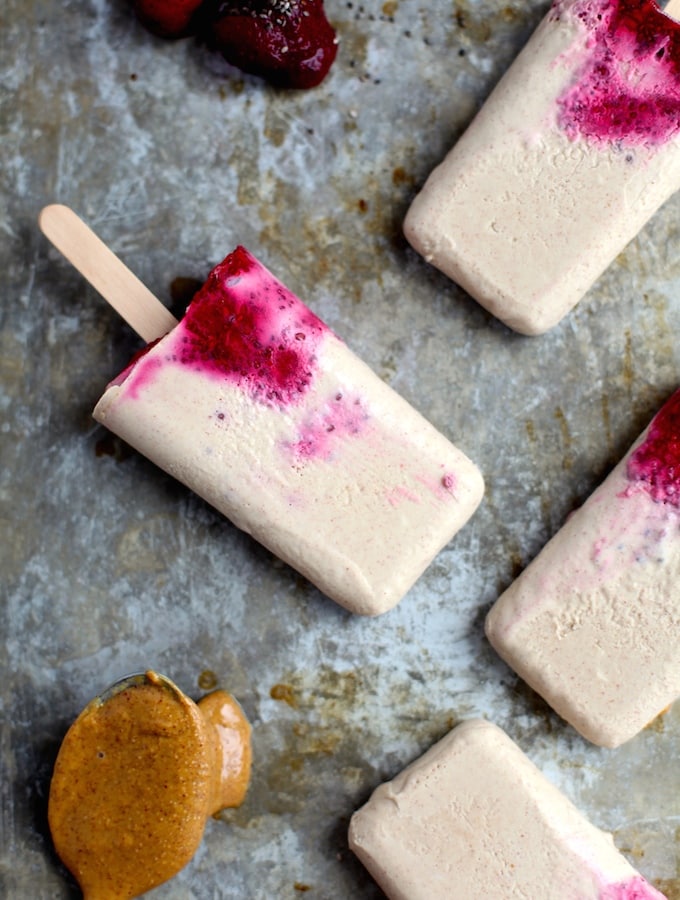
If you are a regular NITK reader you know that I love simplicity. Complicated, intense, and elaborate recipes are just not my thing. I like them quick, easy, with few ingredients. The simpler, the better. So, for this frozen dessert, I decided to mix an ample amount of natural peanut butter with my favourite dairy-free ice cream base, coconut milk, and create a simple peanut butter “ice cream”. I chose to use a large pitted medjool date as my sweetener to keep this recipe vegan for all my lovely vegan readers out there (I commonly reach for honey as well but this is not strict vegan) and it worked perfectly with the PB and coconut milk to add a tad of that necessary sweetness. A ton of healthy fats, no stabilizers, additives, or junk…paired with natural date sweetness… perfect!
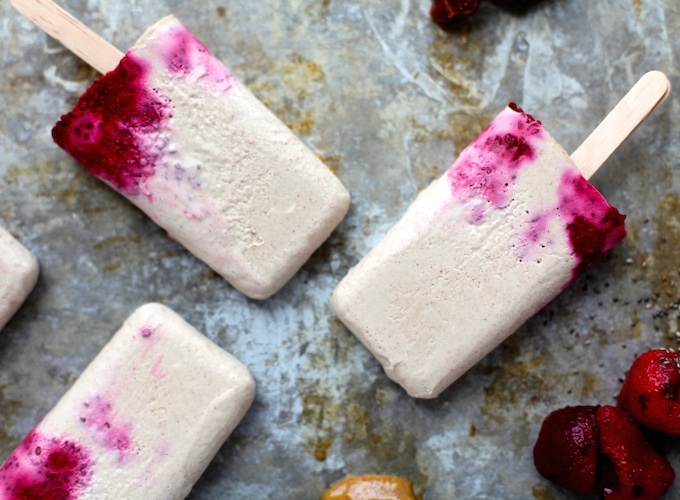
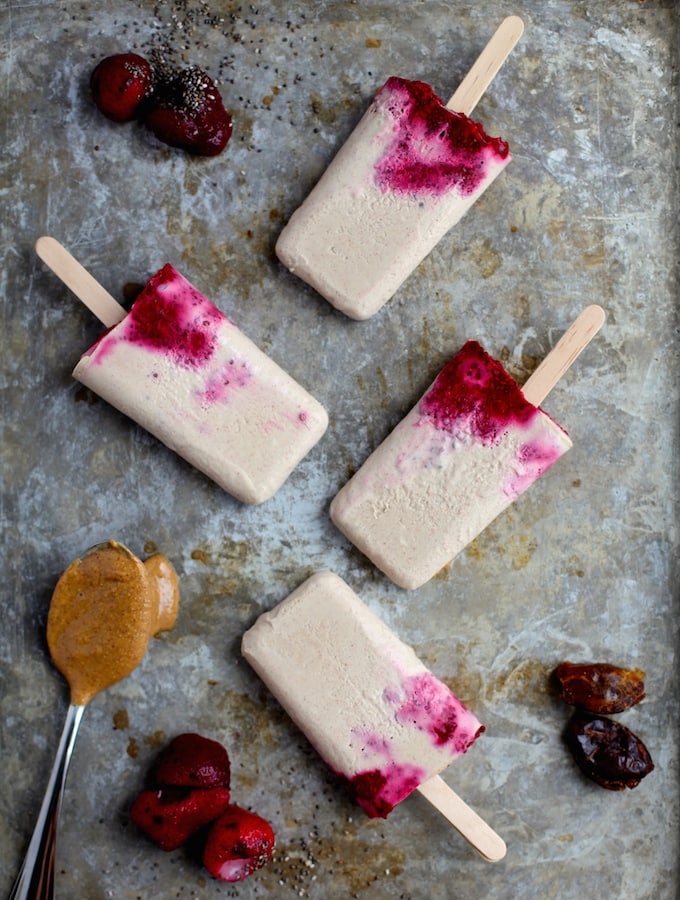
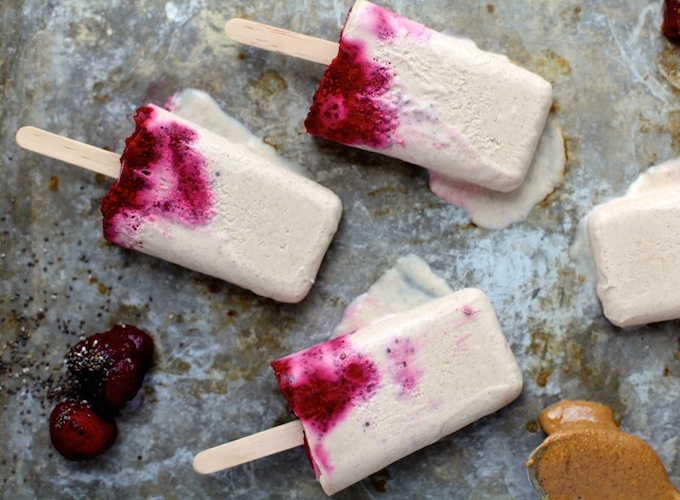
After blending up my peanut butter ice cream mixture I decided to make popsicles instead of scoop-able ice cream for two reasons… first, it’s #popsicleweek …yup, really. Second, making homemade ice cream without an ice cream maker is a longer more arduous process so I opted for the easy-peasy option of just pouring the mixture into popsicle molds! I also thought that swirls of the “jam” would look wonderful mixed with the peanut butter ice cream in the popsicles.
Speaking of the jam. I used a favourite simple trick (whoever came up with this idea originally is a genius) of adding chia seeds to mashed berries. This is literally the easiest way to make natural, no-added-sugar “jam” with the addition of healthy fats and fibre from the chia seeds!
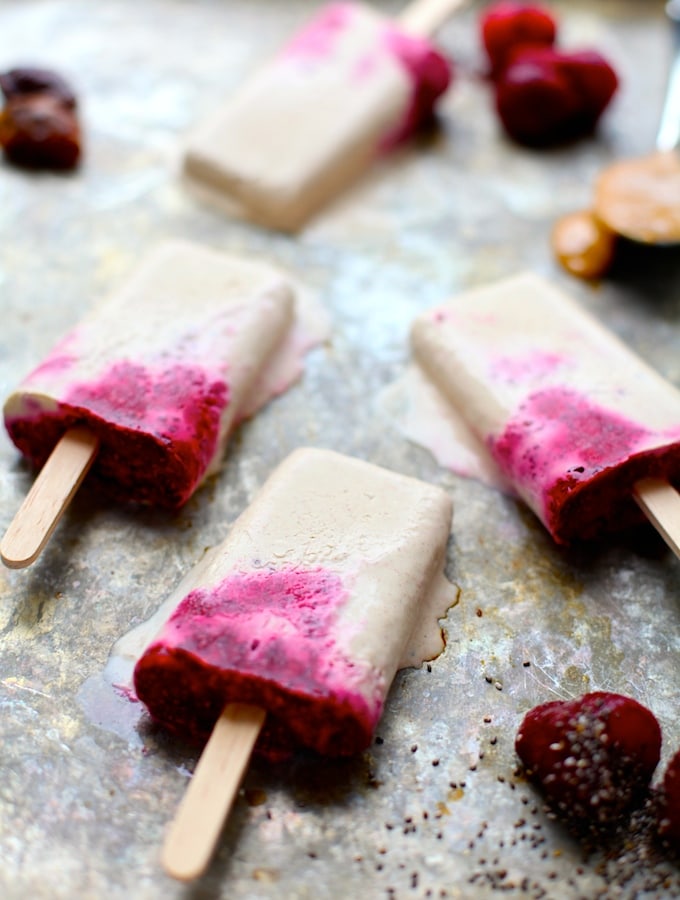
After I poured the PB mixture into the molds, I dropped in dollops of the chia jam and swirled it around to make delicious ribbons of J in my PB & J Ice Cream Popsicles!
The final result was a smooth, creamy, rich and tasty “creamsicle” with hints of tart, sweet, berry goodness. Talk about a wicked awesome Summer treat that even the most novice of kitchen dwellers could whip up!
Do you make your own homemade popsicles, creamsicles, or fudgesicles? What is your favourite combo? I’d love to hear about it in the comments below!
- ½ can light organic coconut milk
- 3 tablespoons natural peanut butter (no added sugars/oils)
- 1 large pitted medjool date
- ¾ cup mixed frozen raspberries and strawberries
- 3 tablespoons chia seeds
- In a blender add the coconut milk, peanut butter, and date. Blend until completely smooth.
- Pour the mixture evenly into a 4-slot popsicle mold.
- Place in the fridge.
- Make the berry chia jam. Heat the berries in the microwave for 45 seconds or on the stovetop until soft. Mash with a fork and stir in the chia seeds. Place in the fridge for 10 minutes.
- Remove the chia jam and peanut butter popsicle molds from the fridge and add dollops of chia jam to the molds using a knife to lightly stir the jam into each cup leaving "chunks" of jam intact.
- Once each mold has chia jam place a popsicle stick into each mold and place in the freezer for 1 hour.
- Remove pops from the freezer and enjoy!
Enjoy the rest of your… #popsicleweek !